|
|
eSense Muscle ManualVersion 1.0.0 - 7.1.3 | created at 02/07/2026 |
|
|
|
eSense Muscle ManualVersion 1.0.0 - 7.1.3 | created at 02/07/2026 |
|
ContentsGeneral1. News 4. Delivery contents eSense Muscle 6. Analysis of eSense data (CSV) 7. Streaming eSense data to a PC/Mac/Browser (eSense Web App, OSC) 8. Duplicate eSense on a large screen (screen mirroring) 9. Troubleshooting connection problems 10. EC Declaration of Conformity 12. Contact Electromyography13. General information on EMG (electromyography) biofeedback training 14. Features of the eSense Muscle 15. The EMG signal Biofeedback Training16. Introduction to eSense Muscle 17. Operating instructions for the eSense Muscle 18. Procedures 19. Open Training Software & AccessorieseSense Mobile App (Android / iOS)21. Notes before starting the eSense Mobile App 22. Preparation and start of the eSense Mobile App 23. General notes 24. General view & Open Training 27. Analysis (after the measurement) 29. Procedure editor 30. Add new module 33. Own media (photos, videos and audios) 34. General settings 35. In App Purchases 38. Marker feature 39. Virtual Reality (VR) (f.i. Meta Quest 3) 40. Compatible Android and iOS devices eSense Web App (www.esense.live)41. eSense Muscle Web App (recommended) Account & Cloud (optional)44. Groups 45. Privacy policy 1. NewsNew in 7.1.3 We’ve overhauled the entire app to improve stability and performance, and added some new features.
Manual & FAQ: https://help.mindfield.de 2. Note Pro and Home versionThere are two versions of the eSense Muscle:
While the professional version is aimed at professional biofeedback trainers, the private version enables the personal use at an affordable price. Details Home Edition
Details Pro Edition
Note: The Pro Edition is unlocked by entering a password in the options. 3. Note on the AppsWeb App vs. Web App for Mobile Devices vs. Mobile App for Mobile DevicesThere are 3 apps available for the eSense Muscle. We recommend these in the following order:
In the following we will go into all 3 briefly. Web App for Desktop (Windows, Mac, Linux)We recommend this app. This is also available with both versions of the eSense Muscle, the private and the professional version. You can find them under www.esense-muscle.com. Link to article: https://help.mindfield.de/en/helpdesk/esense-web-app-recommended Mobile App (Android and iOS)If you want to use the eSense Muscle with an Android or iOS device (smartphone or tablet), we recommend our mobile app. Web App for Mobile Devices (Android and iOS)We recommend our mobile app for mobile devices (see above), but you can still use the eSense web app on a mobile device. Link to article: https://help.mindfield.de/en/helpdesk/esense-web-app-recommended 4. Delivery contents eSense Muscle
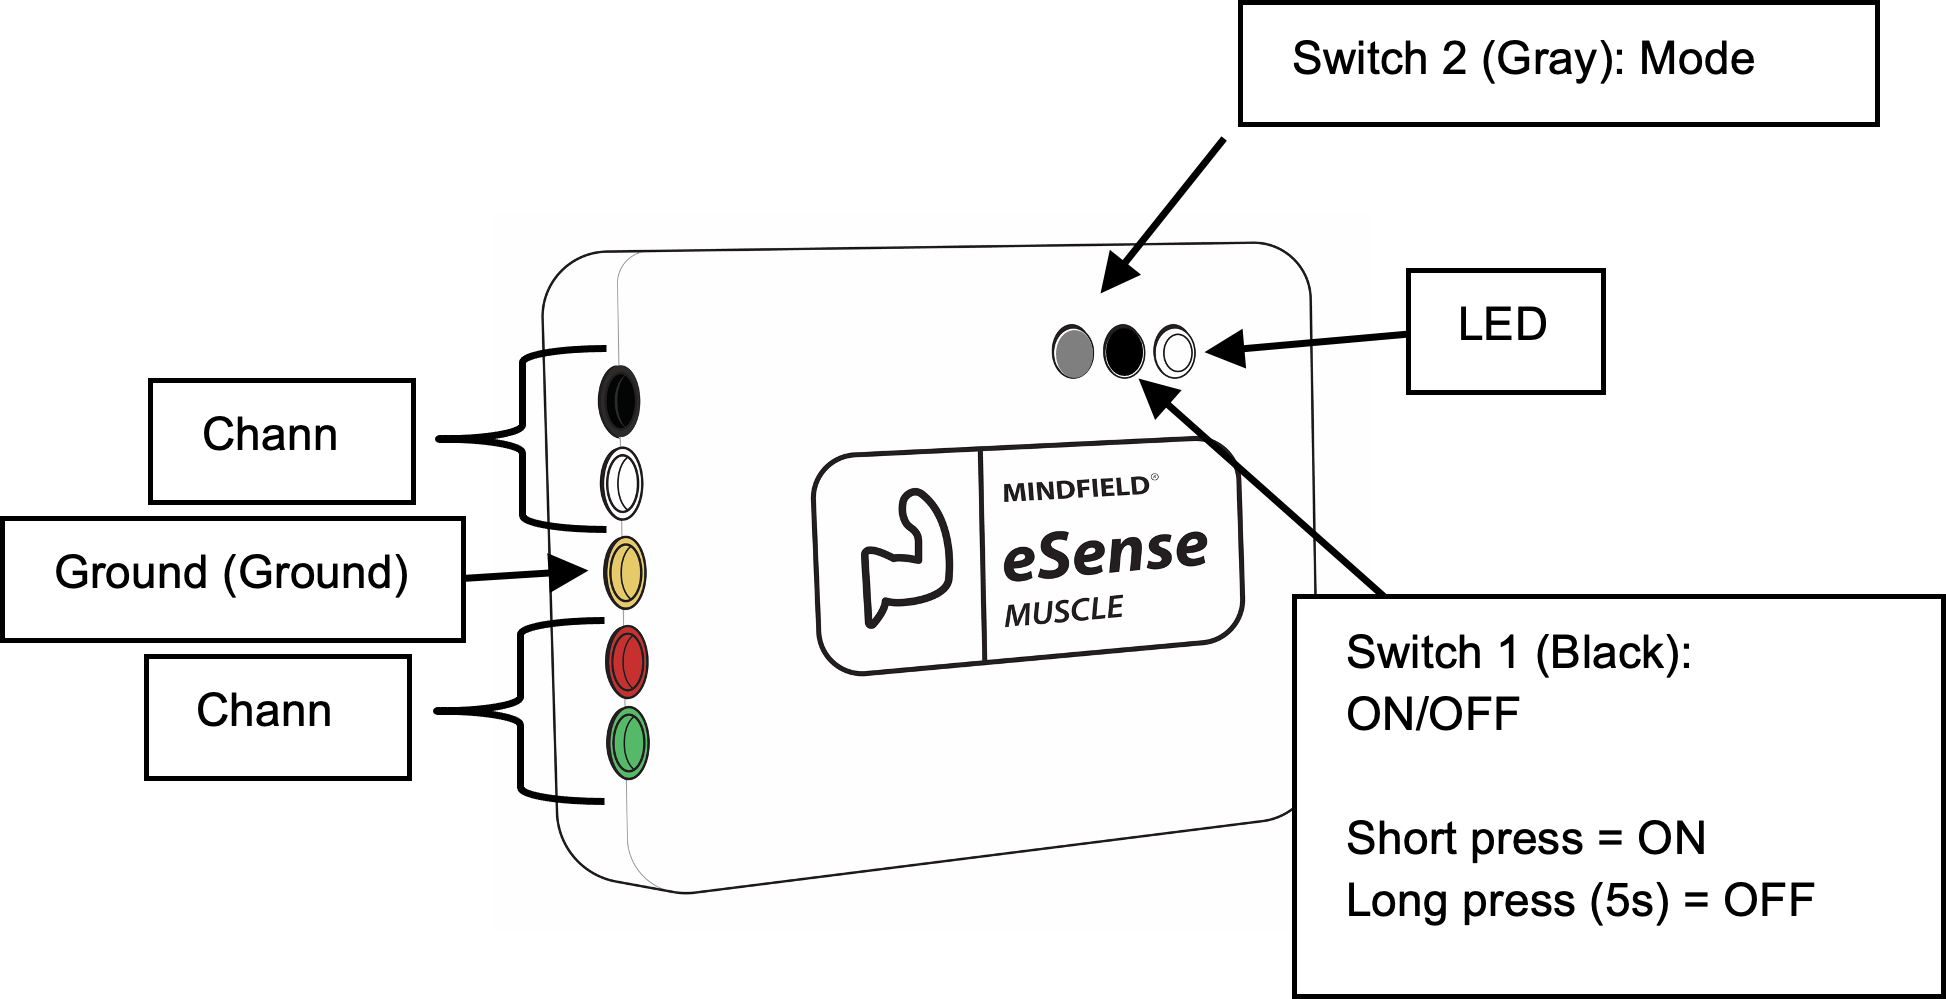
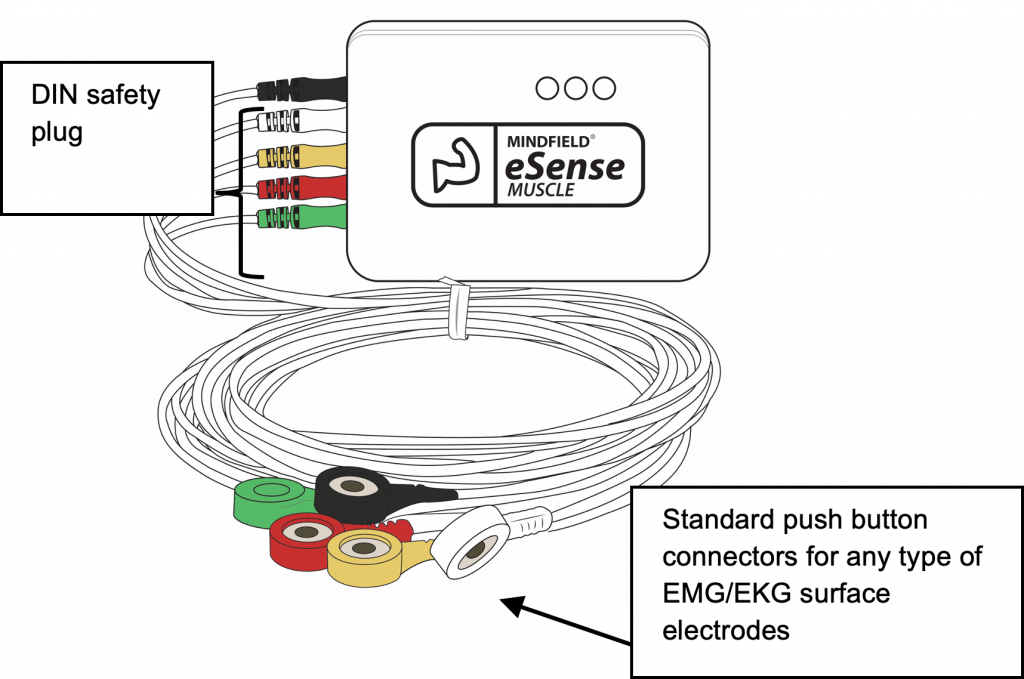
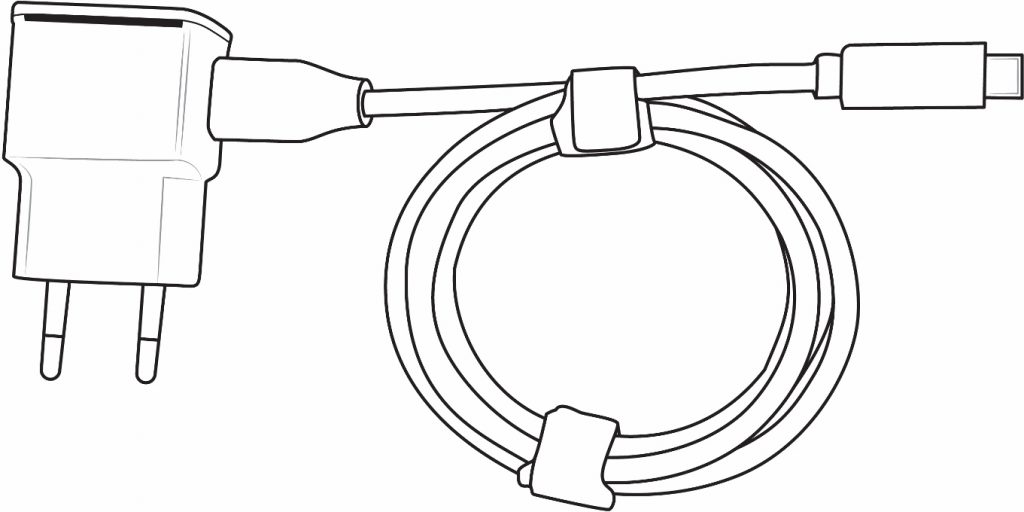 Please only use the enclosed charger!
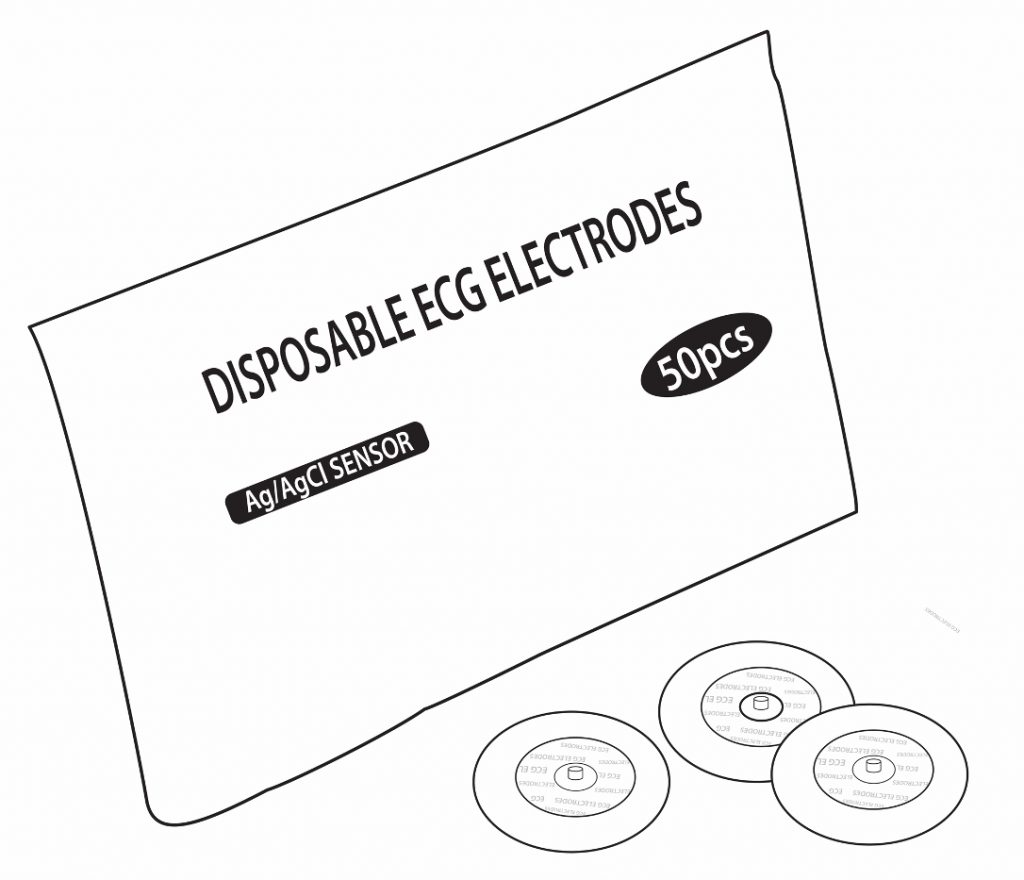
5. Technical DataBluetooth®
eSense Muscle
6. Analysis of eSense data (CSV)You can export the data from the eSense app and then further evaluate it with other programs (such as Microsoft Excel™ or Google Spreadsheets™). In this guide we will show you all the steps, from exporting from the eSense app to importing and evaluating in Microsoft Excel™ and Google Sheets™. For the eSense Pulse we also have a complementary article about the Kubios HRV software. The examples shown in this guide are mostly related to the eSense Skin Response. In principle, however, data from the eSense Temperature, eSense Pulse, eSense Respiration or eSense Muscle can be processed in the same way. Exporting measured values from the Mindfield eSense app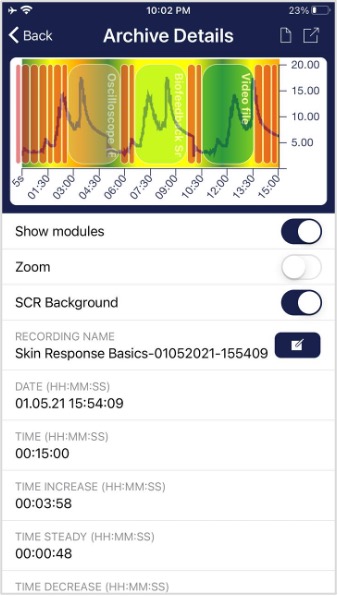 The app also includes an archive where you can save and export your recordings. Export data By tapping on the export icon in the upper right or by tapping the “Export as CSV File” button at the bottom you can export the recordings in .csv format with all common apps (e.g. send via Messenger™, WhatsApp™, email etc.) or simply on your phone or in your cloud (e.g. Google Drive™ or Dropbox™). 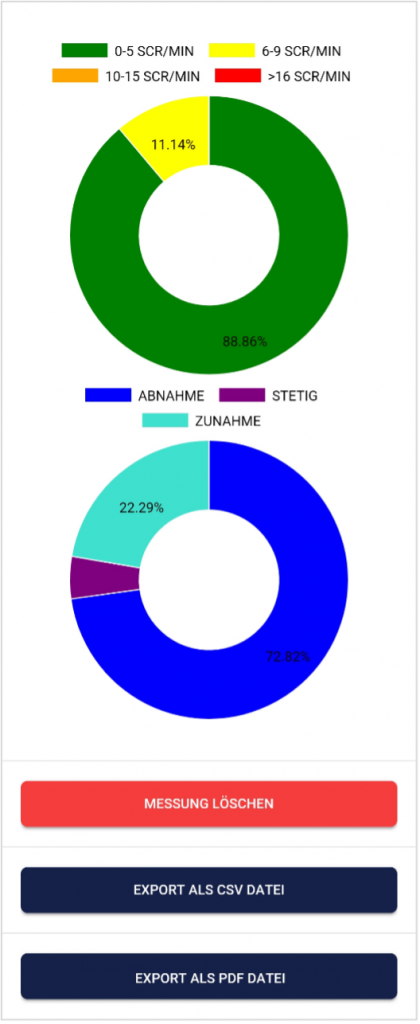 The data is exported as.csv file (comma-separated values). You can open this file format e.g. with Microsoft Excel™ or Open Office Calc™ (free alternative to Excel). If you like working with Google, Google Sheets™ (Google Tabellen™ in German) can also be an alternative to Excel for you. You can also open and visualize your exported.csv files and easily access them from multiple devices via the cloud. Google Sheets has similar functions as Excel and a very similar operation. General NoteThe exported files are always CSV files. CSV stands for “Comma separated values”. This means that a comma separates the values in the file (,). These CSV files can be opened and edited with programs such as Microsoft Excel™, Google Sheets™. It is also possible to import and edit with frequently used programming languages or frameworks such as R™, Python™, Numpy™ or Tensorflow™. These instructions refer to Microsoft Excel™ and Google Sheets™. We recommend beginners to use Google Sheets™ rather than Microsoft Excel™, because it is easier to use and it often works better with our measurements (f.i. the seconds are not automatically prefixed to dates, see in the section on Excel). Google Sheets is also a bit better at quickly creating charts automatically. Using Excel makes more sense if you are already more familiar with Excel. You can find Google Sheets™ here: https://www.google.com/sheets/about/ Your settings at Excel™ and Google Sheets™ are decisive. The eSense app adapts the measured values to the language used. In English, the numbers are usually separated by a dot. Therefore, 1.5 in the English version becomes 1,5 in the German version. So if you open the CSV file with Excel™ or Google Sheets™ and the numbers don’t make sense, it’s usually because of different languages in the eSense app and Excel™ or Sheets™. In principle, therefore, the following applies: If you use Excel™ or Sheets™ in German, you should also use the eSense app in German. If you use Excel™ or Sheets™ in English, you should also use the eSense app in English. This saves you the first two steps (replacing decimal separators and splitting values into columns) and you can start directly with step 3 (Apply skin conductance against time). Microsoft Excel™1. Replace decimal separator (only necessary if you have different language settings in Excel™ and the eSense app)
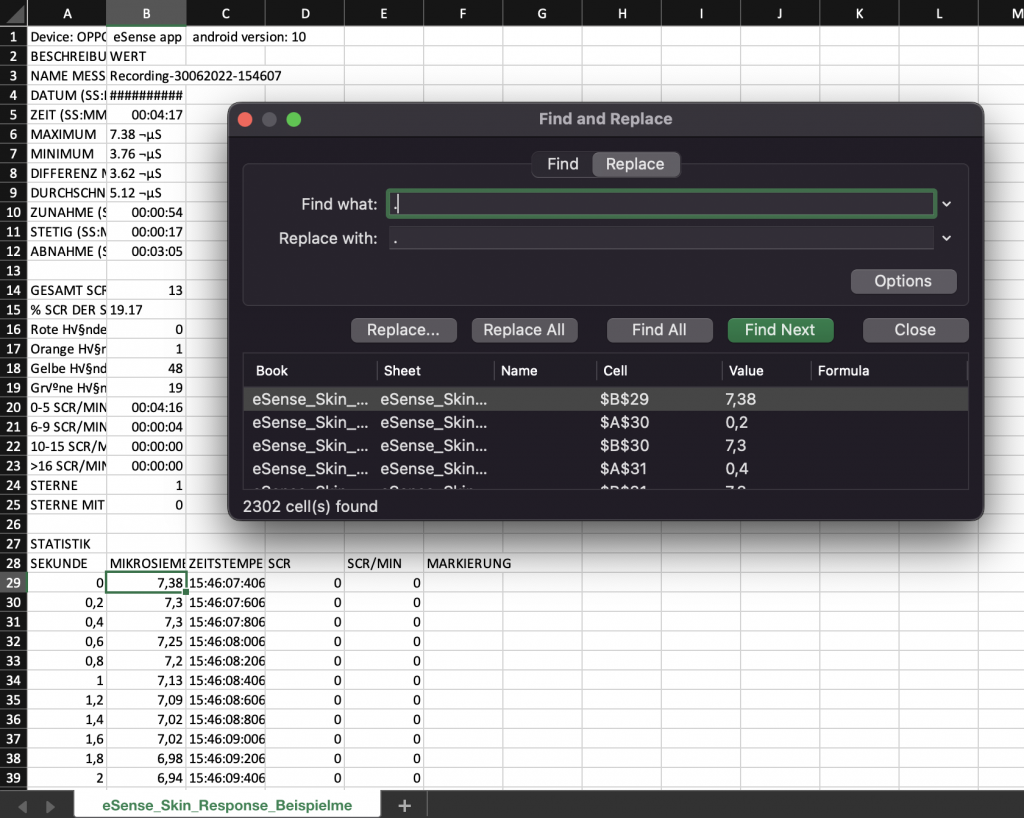 2. Split values into columns (only necessary if you have different language settings in Excel™ and the eSense app) The values for time and measured value are still in the first column, separated by commas or semicolons. You must divide them into two columns.
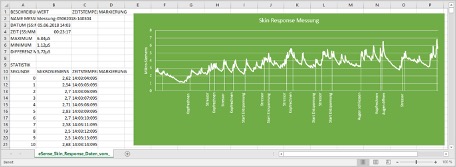
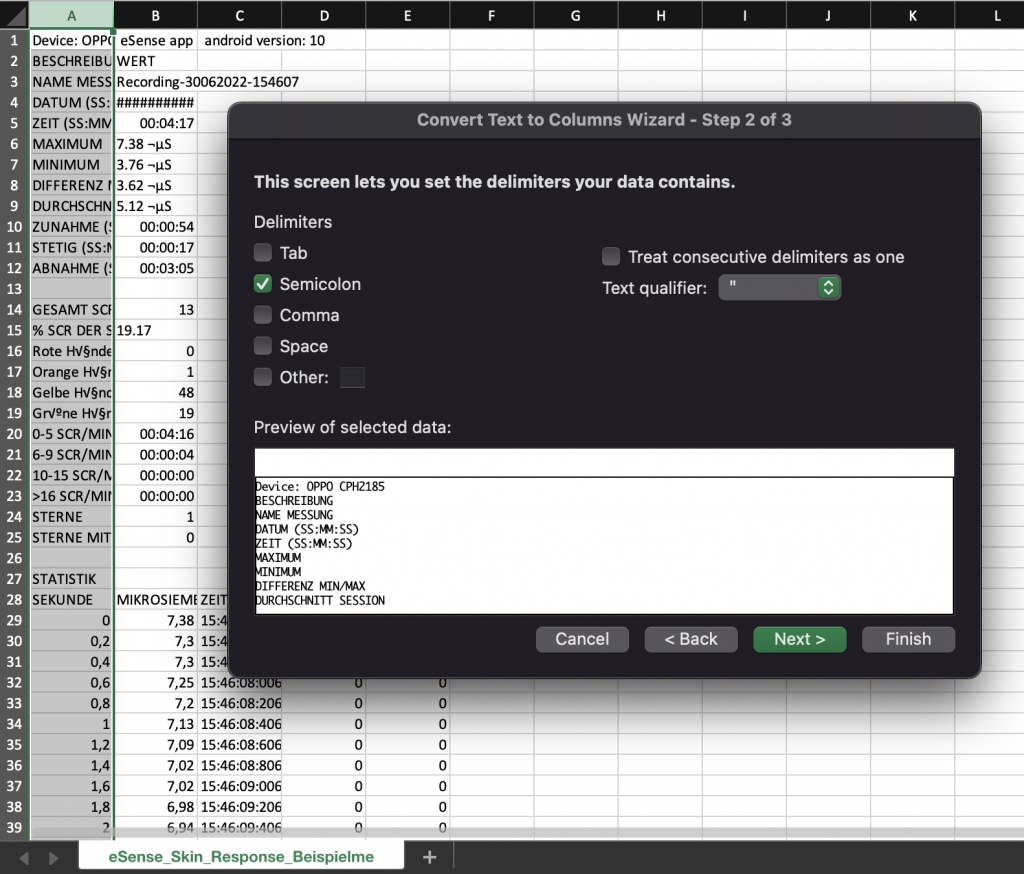 3. Format seconds correctly (optional) Excel often formats the seconds in the first column automatically to a date. Unfortunately there is no way to disable this, it is preset by Excel. But there are a few ways to solve this: https://support.microsoft.com/en-us/office/stop-automatically-changing-numbers-to-dates-452bd2db-cc96-47d1-81e4-72cec11c4ed8 4. Draw skin conductance against time
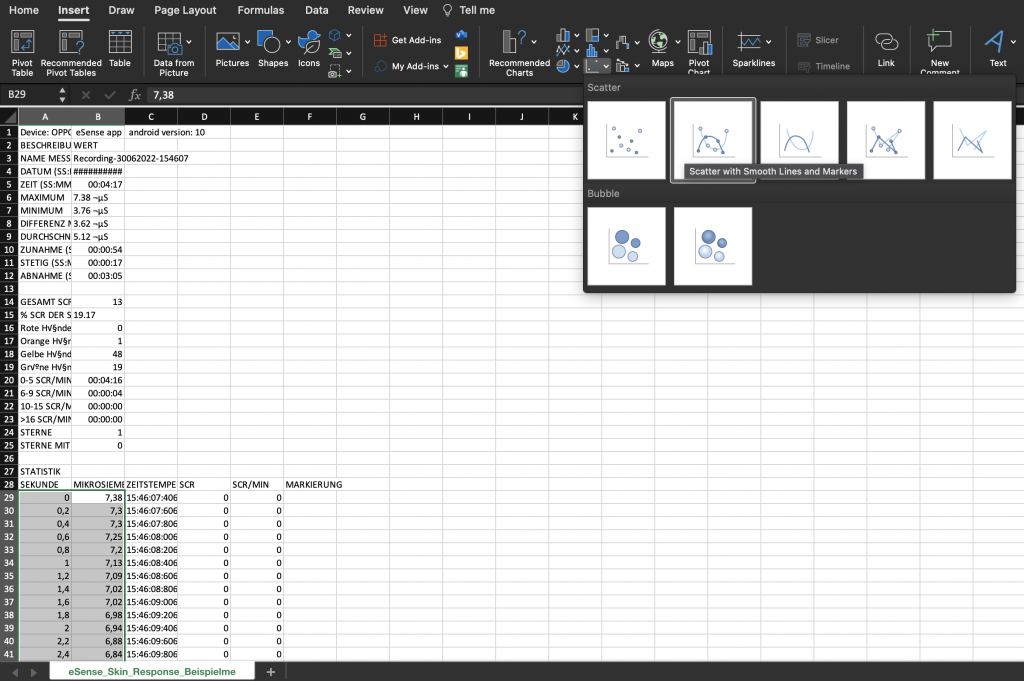 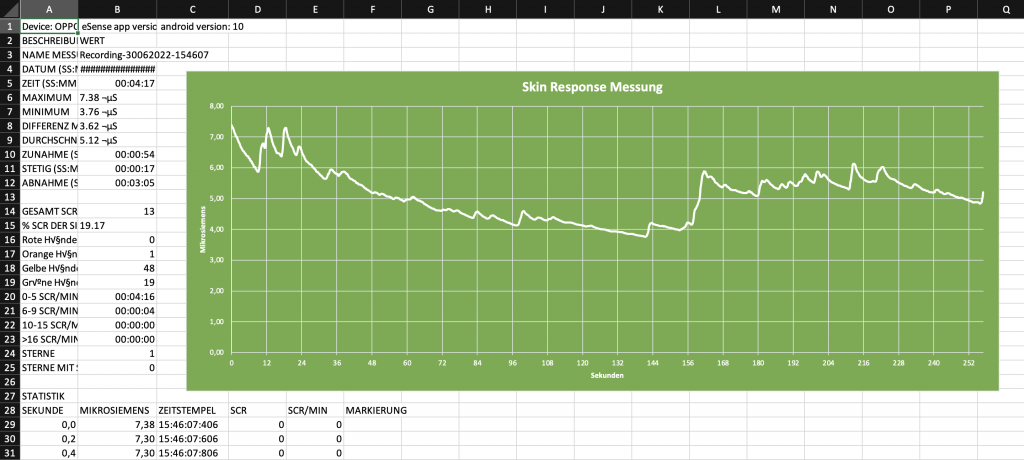 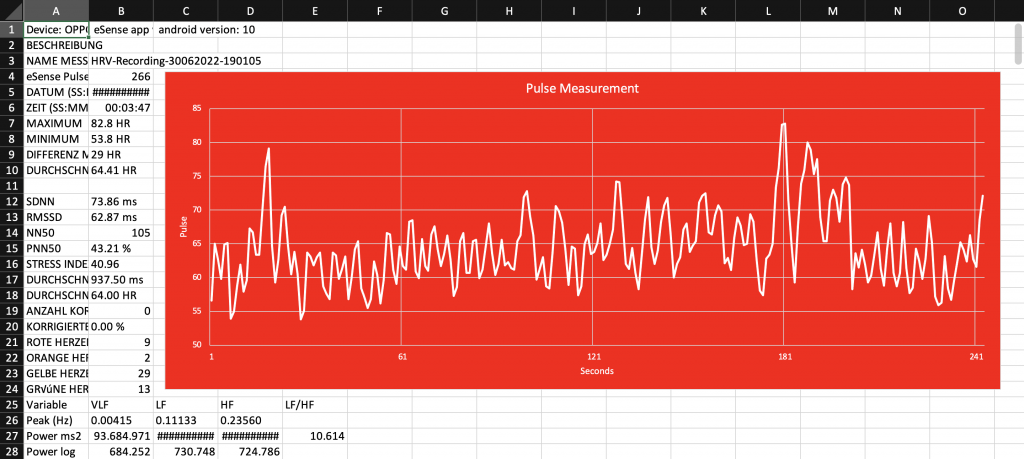 5. Draw skin conductance against markers
 6. Draw skin conductance against SCR
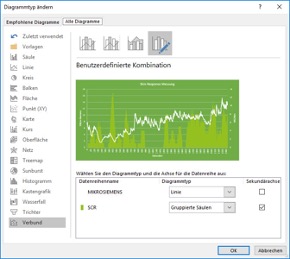 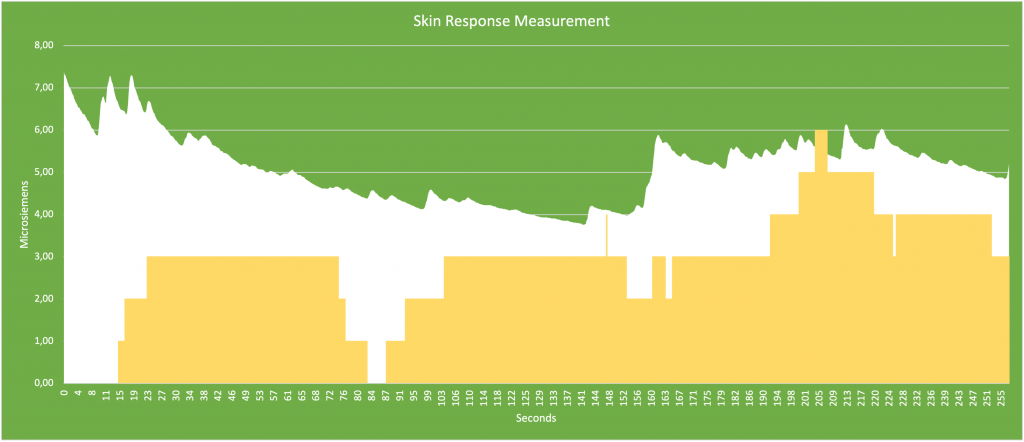 Google Drive (Google Sheets™, recommended)As in Excel™, complications with the separators can also occur here. The exported files are always CSV files. CSV stands for “Comma separated values. This means that a comma separates the values in the file (,) Google often tries to format the data automatically. Then it can happen, among other things, that the measured values are interpreted as date. To prevent this, you should first make sure that you select “Format” -> “Number” -> “Number”. 1. Replace decimal separator (only necessary if you have different language settings in Google Sheets™ and the eSense app)
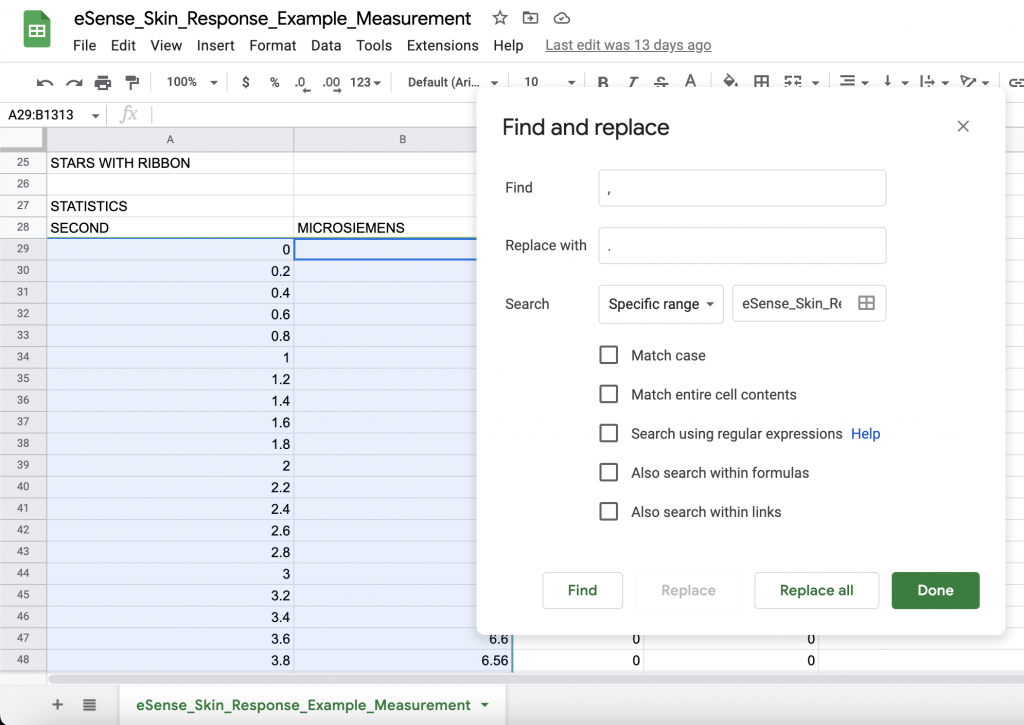 2. Split values into columns (only necessary if you have different language settings in Google Sheets™ and the eSense app) Depending on their language settings, the values for time and measured value are both in the first column, separated by commas or semicolons. You must divide them into two columns.
3. Apply skin conductance against time.
4. Enter main conductance against highlights
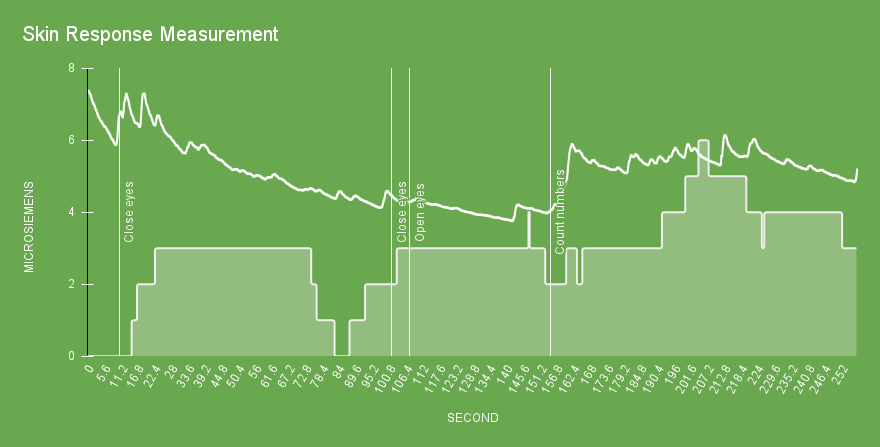 The diagrams made via Google Sheets can also be embedded via iFrame. 7. Streaming eSense data to a PC/Mac/Browser (eSense Web App, OSC)We offer advanced users such as biofeedback trainers, therapists and coaches the ability to stream the measurement data of the eSense sensors via the eSense app to a PC as well. Thus, group courses can be realized or remote training, whereby the trainee can be in a very different place than the trainer. Even a remote supervision is easy. All features described below are not public but available on request. In our online shop, we offer an eSense set for professional users (https://mindfield-shop.com/produkt/esense-set-exkl-sdk) , where the use of these features is included in the price. After unlocking, you can see these features in the settings in the eSense app when you scroll all the way down. Currently, we offer you two ways to transfer data from the eSense App to the PC: our eSense Web App or the OSC Transfer. Both can even be used in parallel but usually it makes sense to use either one of them. The OSC protocol is used for fast and timely streaming and actually comes from the music industry. OSC is open-source and there are a lot of possibilities to integrate the protocol into existing software. eSense Web AppWith the eSense Web App for iOS and Android, we have also developed an eSense web app for the browser, which mirrors and supplements the eSense mobile app. You need an account for the eSense app and one of our plans. You can analyze your recorded data in the browser (with the basic plan) or even stream it in real time to a PC (with the premium plan). With the eSense Web App you can view the measurements of several and different eSenses simultaneously and in real time. For example as professional user you can watch and look after a group of 5 different users, each with their own eSense. Different sensors, for example an eSense Skin Response with an eSense Pulse or Temperature or Respiration, can be freely combined. The users can even be distributed around the world. They just need a smartphone, an eSense sensor, the mobile app and a booked plan. More information about the plans soon here. 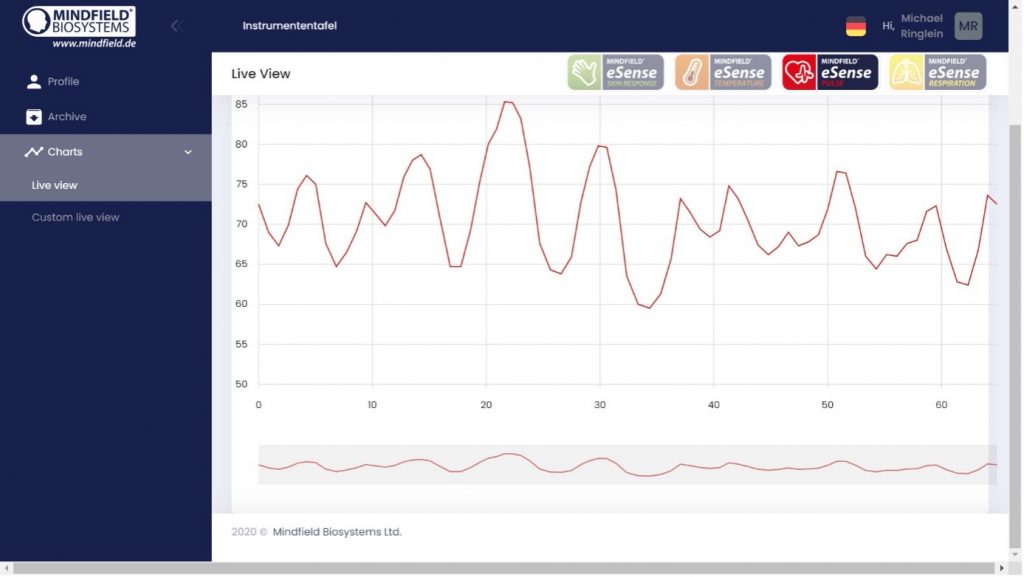 As a private user, you can also benefit from the fact that you can see the graph even better with a large screen and enlarge individual areas. You will find the eSense Web App at https://esense.live. There you can log in with the same account (username and password) as for the eSense mobile app. OSC Transfer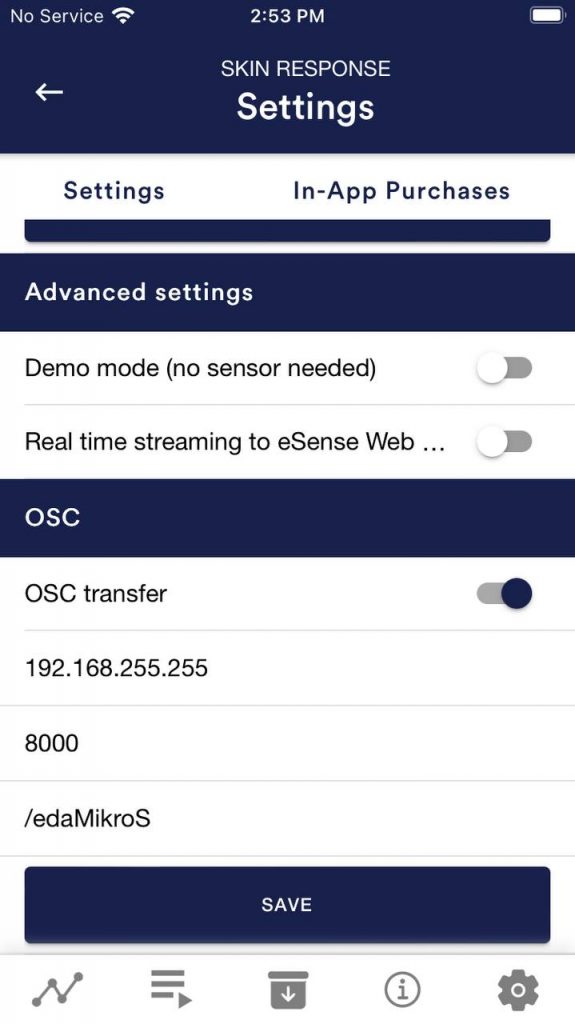 OSC (https://opensoundcontrol.stanford.edu) stands for “Open Sound Control” and is an open-source network protocol developed by the University of California at Berkeley. It is widely used in the music industry because it is great for processing different signals in real time (for example, at a concert where it is important to match multiple microphones and lights in real time). This makes this protocol particularly well suited for the data transmission of several eSenses in real time. Due to the wide distribution in the music industry, there are already some extensions and plugins which you can adjust relatively easily and use in a self-designed software. These are usually found in all common programming languages like for Android, iOS, Java, Javascript, C ++, Python and many more. To use OSC with the eSense app, you must define the IP address of the user receiving the data. This can be a local IP address or an IP address on the internet. You can define the ports as you wish. You should pay attention to firewalls, as they like to prevent the flow of data. You can also define a variable in the app to be able to assign different eSense. This will allow you to sort or filter the eSense (or users) and analyze it better. The OSC transfer is aimed at programmers of (Windows or Mac) software who want to integrate the data from the eSense. The available OSC libraries in the usual programming languages make such integration very easy. You can enable OSC Transfer in the general settings in the eSense app (see screenshot) 8. Duplicate eSense on a large screen (screen mirroring)With the eSense app, it is possible to display the screen content of a tablet or smartphone on a larger screen, which is known as stream mirroring. This allows you to watch your biofeedback training at home on your big screen TV, for example, which can improve your training. The following instructions can be used with all eSense devices. An adapter is always required: Smartphone / tablet (with the eSense app) We generally recommend iOS devices. AndroidWith Android, it only works with newer devices that have a USB-C output and a 3.5 mm jack plug. Android devices with micro USB do not work. Our recommendation is this adapter on Amazon: JSAUX USB C HDMI Adapter, 4K USB Type-C Thunderbolt 3 auf HDMI Adapter https://amzn.to/3Use9HpeSense Skin Response, Temperature and Respiration: If your device no longer has a 3.5mm jack plug and you are already using a USB-C to 3.5mm jack adapter for the eSense, unfortunately you cannot use the USB-C to HDMI adapter. Wireless with HDMI dongles (Miracast / Chromecast etc.)We have had rather mixed experiences with the common HDMI dongles. There are many options, but the dongles generally require an external power supply and are rather complicated to set up. We therefore advise against using them, but in principle it works and is an alternative if no further adapter is available in the device (because the device only has a USB-C but no longer has a 3.5mm jack plug). iOSYou can connect a Lightning Digital AV Adapter or a USB-C Digital AV Multiport Adapter to the Lightning port of your iOS device and use an HDMI cable (sold separately) to connect your iOS device to a TV or projector. In principle, this is possible with any iPhone, iPad and iPad Pro that are also compatible with our eSense app. We expressly recommend only original Apple adapters. Others may work under certain circumstances if they have MFI certification. However, Apple could change something at any time, so we do not recommend third-party adapters, which may not be updated quickly enough and may no longer be compatible. You can find the original Apple adapters on Amazon: Apple Lightning Digital AV Adapter https://amzn.to/3y7ndtY
Apple USB-C-Digital-AV-Multiport-Adapter https://amzn.to/3wdvoEx
eSense Skin Response, Temperature and Respiration: iOS also requires a USB-C to 3.5mm jack adapter for these eSense devices (this is not required for the eSense Pulse and Muscle as they connect to the smartphone or tablet via Bluetooth). This means that if you want to use an iPad with the eSense, it should also have a 3.5mm jack connection. The iPad Mini 5 would be an example, this is slightly older, but still has the 3.5mm jack connection. For normal iPads, the 9th generation devices were the last with the 3.5mm jack connection. We recommend https://www.refurbed.de/c/ipads/ or https://www.rebuy.de/kaufen/apple-tablets to purchase these at a reasonable price. Wireless with AirplayWe have had good experiences with AirPlay. The setup at Apple is very simple, the best solution is probably a used Apple TV from 50 euros: Apple TV 4K Gen 1 https://www.refurbed.de/p/apple-tv-4k-5th-gen/ Mini projectorThere are now also relatively good mini projectors available for an acceptable price. In our experience, these are not particularly bright, but in a sufficiently dark room they are an option. The projector only needs an HDMI input. 9. Troubleshooting connection problemsIn case of Bluetooth® connection problems between the eSense Muscle and your end device, please check the following steps:
10. EC Declaration of Conformityaccording to the following guidelines: 2014/30/EU OF THE EUROPEAN PARLIAMENT AND OF THE COUNCIL of 26 February 2014 The manufacturer / Distributor / Authorized representative Mindfield Biosystems Ltd. hereby declares that the following product: “Mindfield® eSense Muscle” follows the provisions of the guidelines identified above and their amendments in force at the time of the declaration. The following harmonized standards have been applied: DIN EN 62368-1:2016-05 Equipment for audio and video, information and communication technology – Part 1: Safety requirements DIN EN 61326-1; VDE 0843-20-1:2013-07 Electrical equipment for measurement, control and laboratory use – EMC requirements – Part 1: General requirements (IEC 61326-1:2012); German version EN 61326-1:2013 DIN EN 61326-2-2; VDE 0843-20-2-2:2013-08 Electrical equipment for measurement, control, and laboratory use – EMC requirements – Part 2: Electrical equipment for measurement, control, and laboratory use Part 2-2: Particular requirements – Test arrangement, operating conditions and performance characteristics for the portable test, measurement and monitoring equipment for use in low-voltage power supply systems (IEC 61326-2-2:2012); German version EN 61326-2-2:2013 Place: Gronau  WEEE-Reg.-Nr. DE 24465971 11. Battery InformationThe eSense Muscle uses an internal Lithium Polymer battery with 3.7V operating voltage. The eSense Muscle is charged with five volts via the included USB-C cable and USB charger. You can read the current state of charge in the eSense (web) app. To save the battery, the device switches off after two minutes of inactivity; i.e., without Bluetooth® connection or recording to SD card. Changing the battery by the user is not provided. The manufacturer can only replace the battery.
12. ContactMindfield® Biosystems Ltd. · Hindenburgring 4 · D-48599 Gronau Tel: + 49 (0)2565 406 27 27 · Fax: + 49 (0)2565 406 27 28 · E-Mail: info@mindfield.de If you have questions about our products or need support, please do not hesitate to contact us! To avoid inappropriate advertising and spam, we ignore messages with specific content. We therefore ask you to not write links in the contact form. If this should be necessary, please write us an email. Please do not send unsolicited packages to us. Unfree returns will not be accepted and cannot be processed. 13. General information on EMG (electromyography) biofeedback trainingThe musculature of the human being plays an essential role in the body. Our muscles are the largest energy consumer and are responsible for about 70- 80% of our body weight. Muscle activity is manifested along the fibers of a striated muscle in the form of permanent, electrical potential shifts. This electrical activity can be measured at the skin surface in the form of more considerable summation potentials. This form of measurement is called (surface) electromyography, and the result is an electromyogram. The eSense Muscle can measure and train electromyographic muscle activity and transmit it to your computer/smartphone/tablet via Bluetooth®. Transverse striated muscles are controlled by our somatic nervous system and are subject to voluntary control. Every volitional action of a muscle can therefore be observed in an electromyogram. Thus, the tension of a muscle on 27 which surface EMG electrodes are placed immediately leads to increased trace in the EMG signal.  However, involuntary reactions, such as stress, inner tension, and emotional experience, can also be measured as (tonic) activity in the EMG. EMG biofeedback can also report back the general psychophysiological tension. The interplay between the autonomic and somatic nervous systems can be depicted particularly well in the EMG. Increased muscle tone is mainly based on an increase in sympathetic activity. A decrease can be attributed to more robust parasympathetic activation. 14. Features of the eSense MuscleThe eSense Muscle can measure and train electromyographic muscle activity and transmit it to your computer/smartphone/tablet via Bluetooth®. The eSense Muscle with the eSense App offers you:
15. The EMG signalWith EMG, we measure a voltage curve over time. We pay attention to the amplitude (the magnitude) of the signal and the frequency. Depending on the musculature, considerable differences become plain. An EMG signal from a small muscle; e.g. from a finger on the hand, is significantly lower in amplitude and frequency range than the signal from the large thigh muscle. The eSense Muscle can measure the EMG raw signal and transmit it via Bluetooth®, as well as already three preset bandpass signals (RMS) in the frequency ranges: 20 Hz to 950 Hz, 20 Hz to 300 Hz and 100 Hz to 200 Hz You can select and use these in the eSense web app and the mobile app. In biofeedback, we work exclusively with these bandpass RMS signals, as these are related to amplitude and applied muscle force. The amplitude ranges from a few µV (millionths of a volt) to several hundred µV in particularly strong muscles. The frequency range of the EMG signal does not play a significant role in EMG biofeedback. It only emphasizes the signal part you want to look at. EMG activity has a broad frequency spectrum, from 10 Hz to 500 Hz, focusing between 25 and 300 Hz. Choose a wide filter (20-950 Hz) if you want to capture and feedback all components in the EMG and choose a narrow filter (100-200 Hz) if you’re going to capture the majority and filter out possible sources of interference such as pulse artifacts or mains hum. It is advisable to always choose the narrowest filter (100-200 Hz) first and to check whether the measured signal is represented sufficiently well with it. The filter should only be widened and set wider if the amplitude appears too small and not very reactive. 16. Introduction to eSense MuscleTo reduce stress and its vegetative symptoms, an EMG biofeedback training can be performed by causing a reducing the muscle tone of certain “stress muscles” is aimed at. Typical stress muscles are the muscles of the forehead (M.Frontali), the jaw muscles (M.Masseter) and the shoulder muscles (M. Trapezius). Examples of possible EMG measurements: 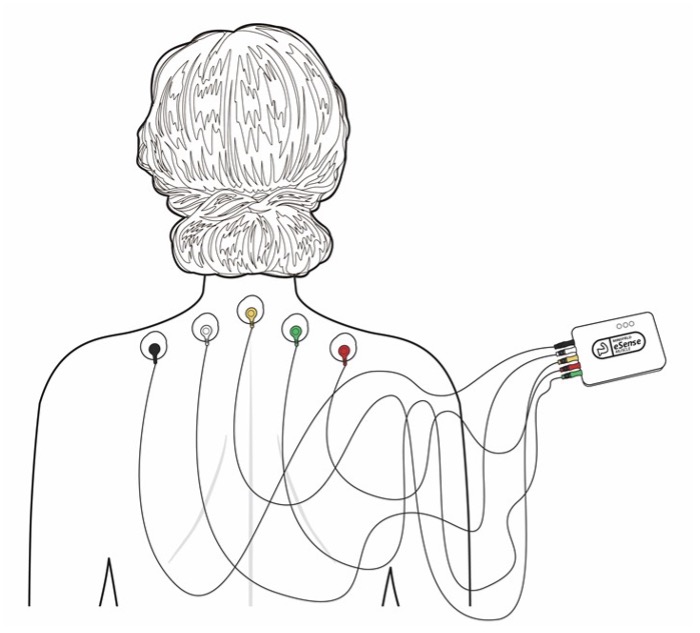  Through exercises that involve targeted tensing and relaxing (similar to the progressive muscle relaxation) these muscles can be lowered in their basic tone and thus reduce stress. For muscle building and strengthening individual muscles or muscle groups, a variety of possible derivations can be used. The electrodes of a channel are placed closer to each other, the more precisely the underlying muscle is recorded. With increasing distance you reach the activity of larger muscle groups. During training you, then muscle tone increase maximum values and improve endurance. For this purpose, tension phases with progressive training being prolonged and increased. Pay attention however also make sure to always incorporate sufficient rest phases. For coordination exercises and targeted separation of muscle groups (e.g. lifting the arm without “pulling up” the shoulder), channel 1 and channel 2 can be cleverly combined. For example, channel 1 can be applied to the muscle that is to be tensed, while channel 2 can be applied to an adjacent muscle. Muscle to be tensed, while channel 2 “monitors” an adjacent muscle so that is not tensed during the movement. Each muscle movement generates a characteristic pattern under an EMG measurement, which is pattern, which can be practiced and repeated in the software. The possibilities of using EMG biofeedback are very diverse. Let a professional user assist you in this regard if you have any questions. Important: If you are suffering from a medical condition, do not perform a treatment on your own and always consult a therapist. The eSense Muscle is not a medical device and may be used exclusively for stress reduction, muscle building, relaxation of tension and for coordination exercises to be used! 17. Operating instructions for the eSense MuscleContents of the packaging:
Remove the electrode cable set from the package. There are five electrode cables included: black, white, yellow, red and green. The yellow electrode cable is the ground electrode! For a 1-channel measurement, please use the electrodes black (channel 1+), white (channel 1-) and yellow (ground). For a 2-channel measurement, please use the electrodes black (channel 1+), white (channel 1-), yellow (ground), red (channel 2+) and green (channel 2-). Two examples of a one-channel measurement: 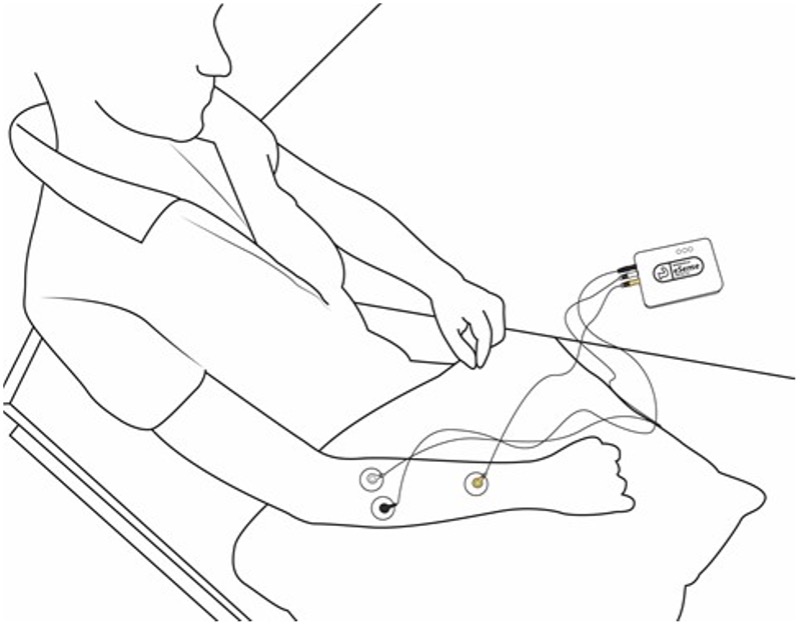 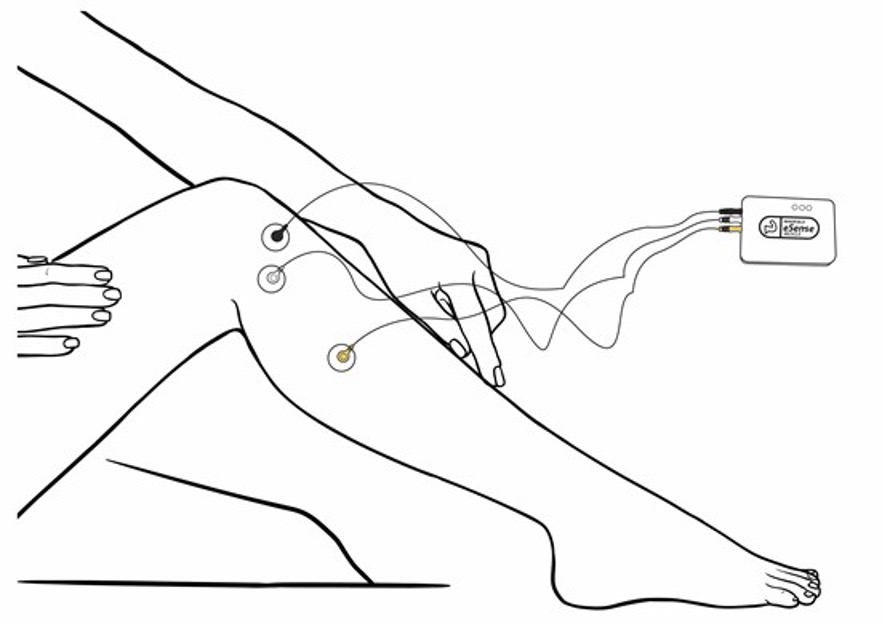 An example of a two-channel measurement: 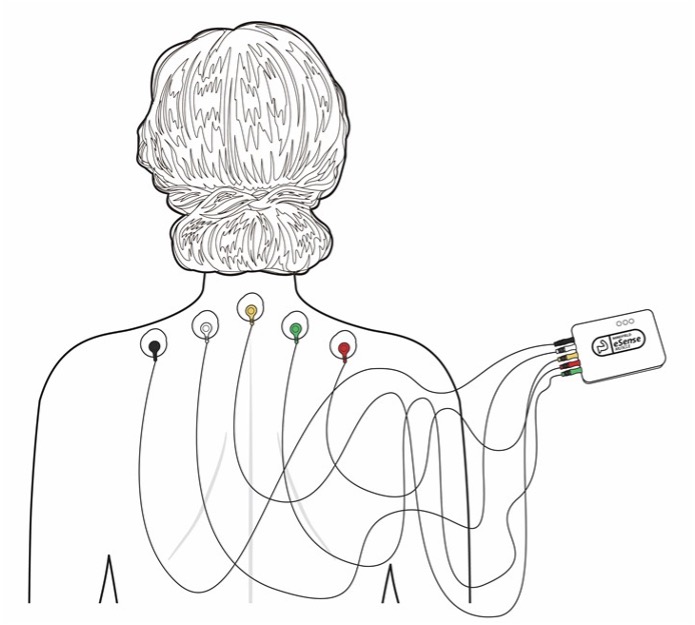
18. ProceduresA procedure consists of different modules. The procedures can be used, for example, to implement instructions for relaxation, a stress test, a defined biofeedback training session or tasks for research purposes. The possibilities are manifold. During a procedure, your this electromyographic activity is recorded. At the end of a procedure, a summary is displayed, showing your readings for each module and the overall view. 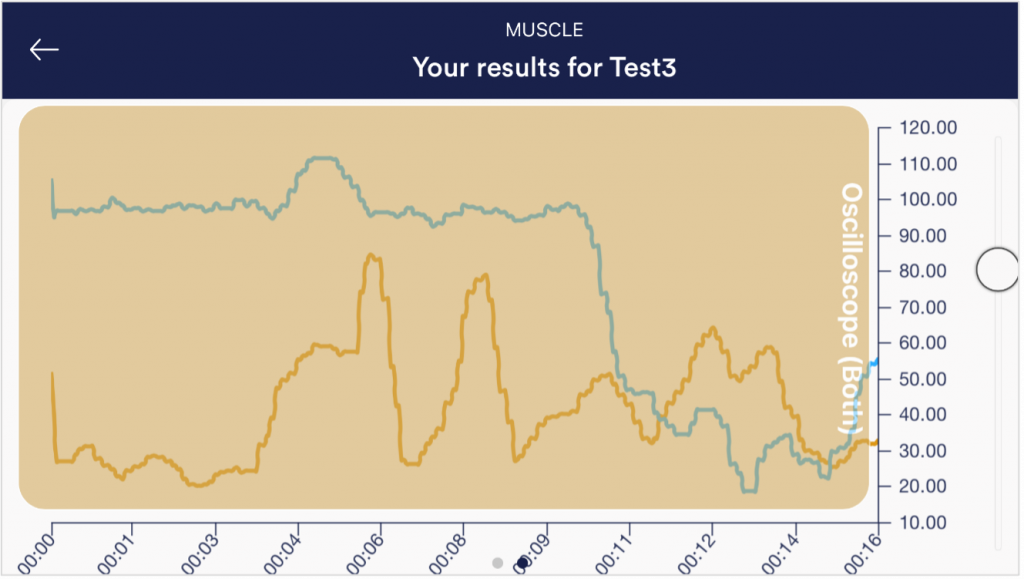 We recommend that you try the demo procedures included in the app. These give you a guided overview of the different modules and functions. The included procedures are also protected by a password in order that those can’t be edited or deleted by accident. You can any time create a copy of those procedures without a password and change it as you wish. We also explain in detail how you can create and edit your own procedures in the chapter procedures settings. 19. Open TrainingAs a second option, you can also do free training. This differs from the procedures in that it is a little more complex. In the following we give you a few examples of how EMG biofeedback training with the eSense Muscle could look in different applications. Please consider this only as a rough guide. There are a variety of options, this is just a brief overview. There is a lot of literature on the subject of EMG biofeedback, which gives further assistance on how to proceed. Preparation and start
Usual applications, for example muscle building training
Common uses, for example muscle relaxation
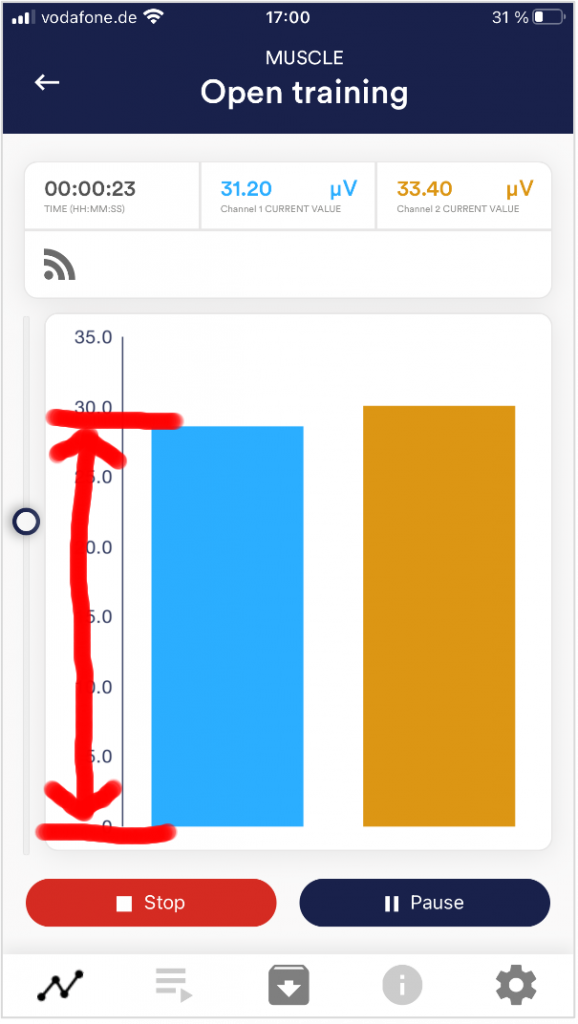 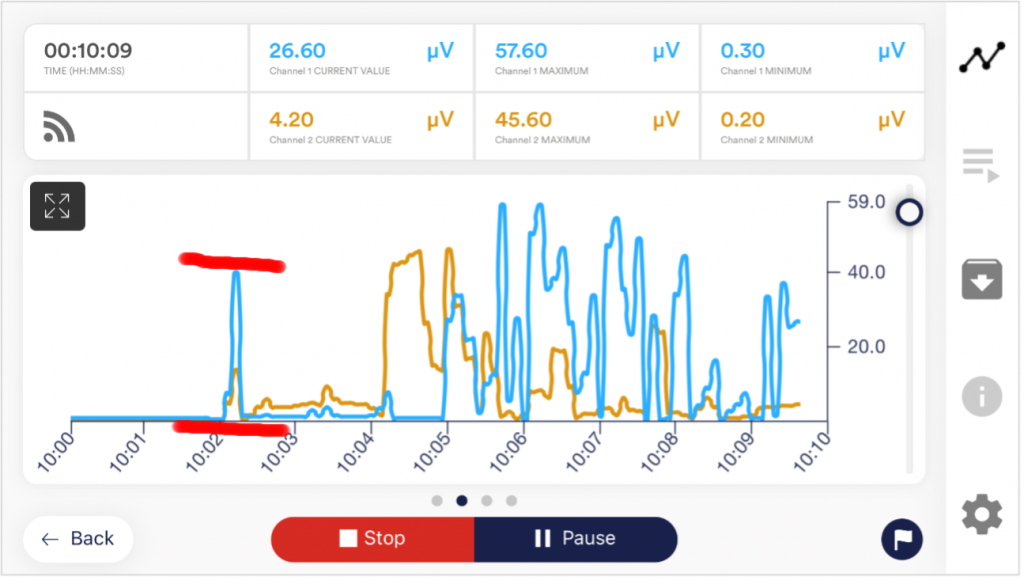 Two images of the muscle tension bar in portrait format and the muscle signal curve in landscape format.
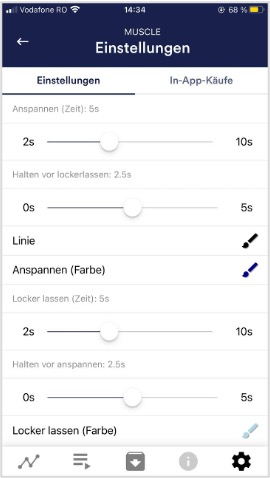 5 seconds to tense, hold for 2.5s and 5 seconds to relax, let loose for 2.5s (= 4 contractions per minute)
Usual applications, example stress test
20. Cleaning and CareFor cleaning and care, there are the following essential tips:
21. Notes before starting the eSense Mobile App The Pro Edition of the eSense Muscle includes the eSense Mobile App. It offers a wealth of features for effective biofeedback training in a modern design. The app is available in English, German, Spanish, French, Italian, Portuguese, Ukrainian, Russian, Turkish, Dutch, Japanese and Chinese. The language is chosen automatically according to the set language of the smartphone or tablet. In the following course of the manual we will now go into the use of the mobile app. For an explanation of the use of the web app, please watch the videos at www.mindfield-esense.com. Many of the instructions on how to proceed are congruent between the mobile app and the web app. Therefore, please always make yourself fully familiar with this manual, it conveys a lot of knowledge for a successful use of the eSense Muscle, regardless of the software application. Download LinksiOS: https://itunes.apple.com/us/app/mindfield-esense/id1141032160?mt=8 Android: https://play.google.com/store/apps/details?id=com.mindfield.boisystem.esense 22. Preparation and start of the eSense Mobile AppCreate the conditions needed for a successful training:
Strong physical activity before measurement should be avoided. In order to obtain comparable measurements, you should always train under the same conditions . The number of sessions required for reliable success is relatively small compared to other biofeedback training sessions. Usually, six to ten sessions are sufficient. As far as the duration of a session is concerned, it depends on your ability to concentrate, but should not exceed 30 minutes. If you are experiencing severe fatigue, the training should be shorter and a higher number of sessions should be done. The next step is to start the app. Home Screens 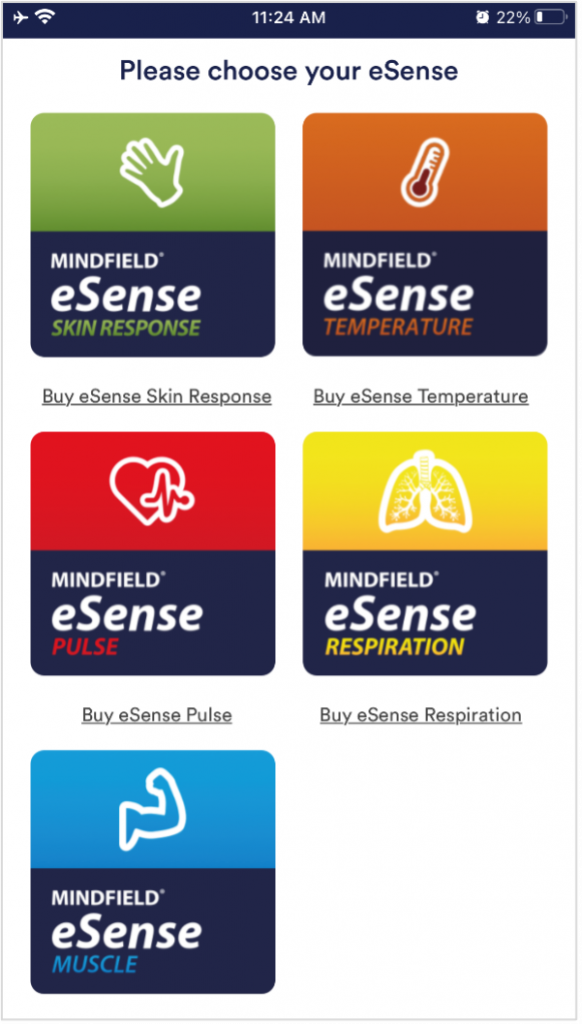 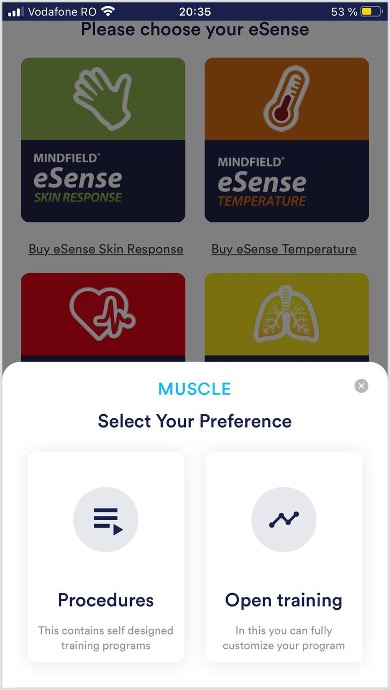 First tap on the logo of the eSense you want to use (here eSense Muscle) and then choose between procedures or free training. At the beginning you can choose between a free training and a procedure. We recommend that you start with a procedure 23. General notes
In following the app is described in full details. 24. General view & Open TrainingPortrait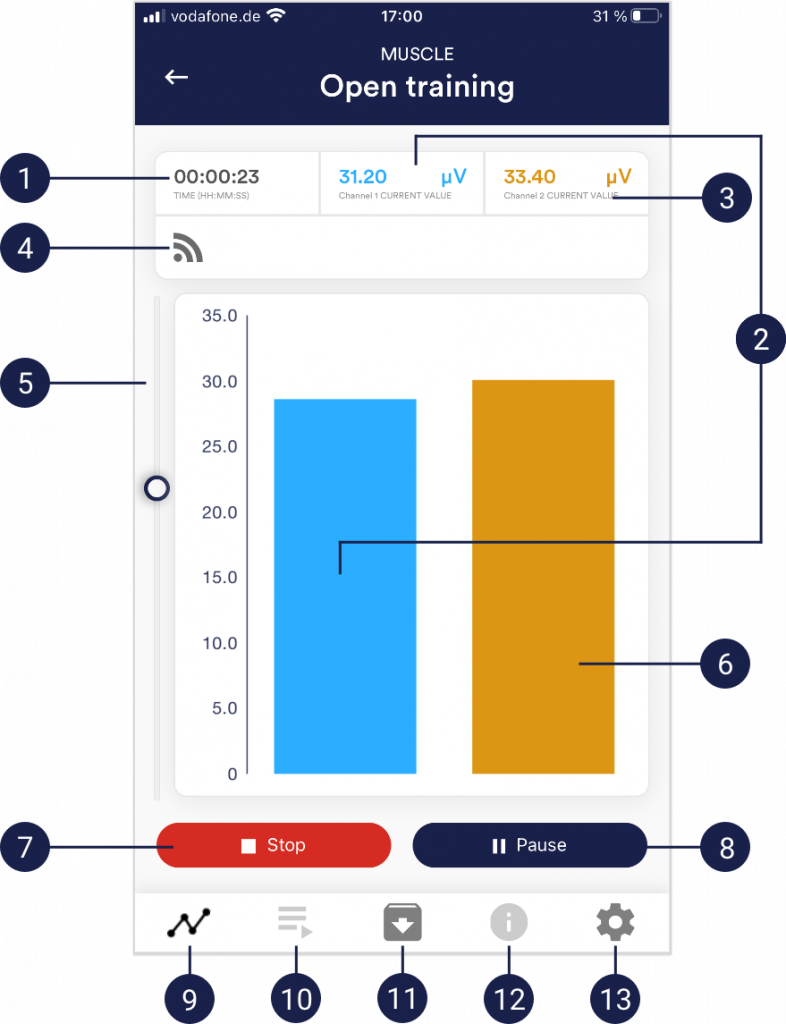
Landscape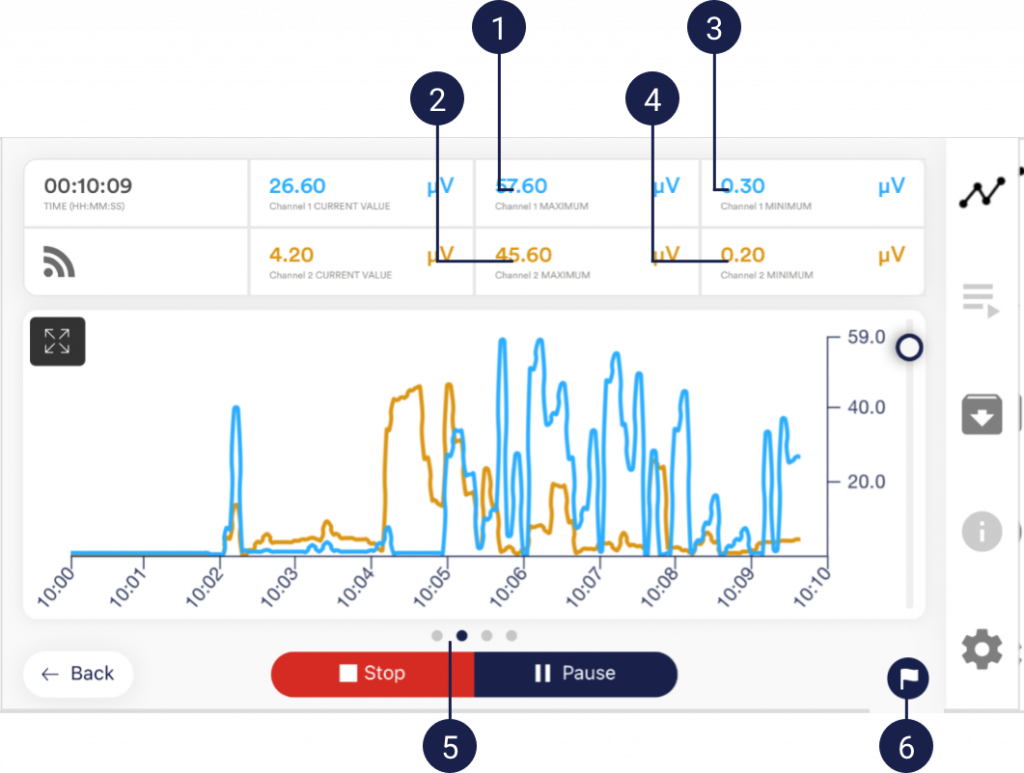
25. Contraction Helper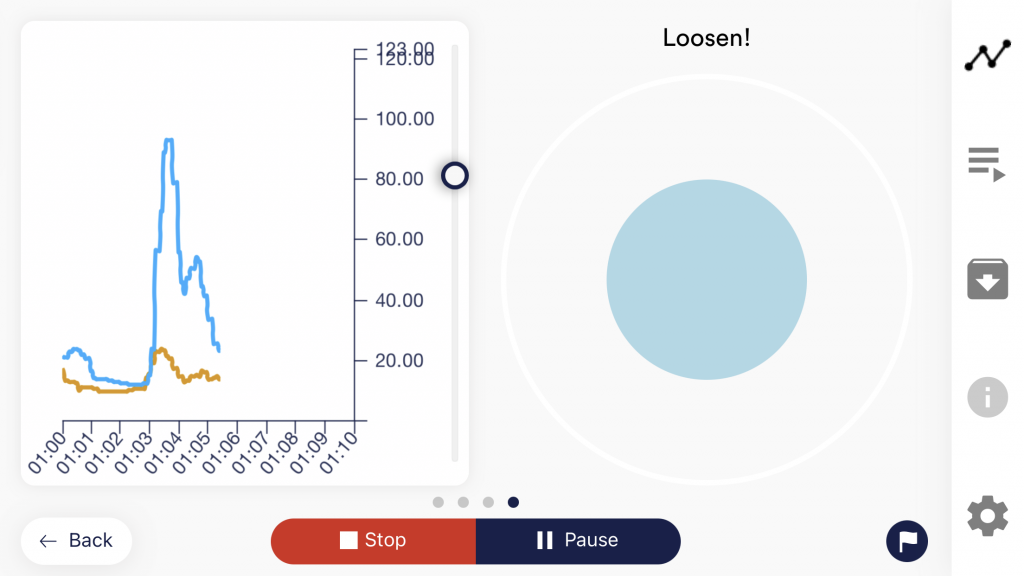  You can activate the contraction aid in the general settings. Tension and relax your muscle as the sphere expand. With growing sphere tension, with shrinking sphere relax. 26. Survey (optional)If you have activated this option in the general settings, a small survey will appear immediately after each measurement. This allows you to archive measurements that are reproducible in the long term or to document a change in your measurements. (If you for example start to use the eSense while lying down instead of sitting down). 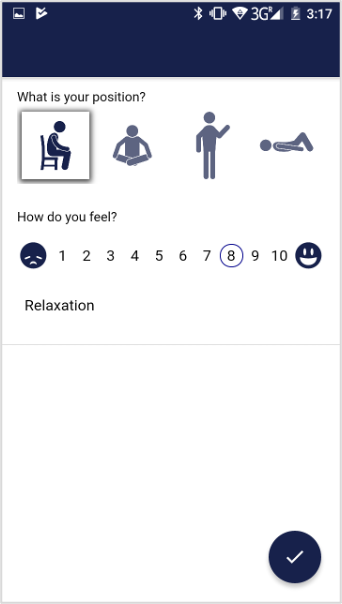 Your position during measurement How do you feel? Note function, optional 27. Analysis (after the measurement)After the measurement (and optional questioning), in landscape format, a screen appears with an analysis: the measurement duration, the filter used, the refresh interval and the lost packets in percent. In addition, the minimum and maximum values of the channel(s) are displayed. At this point, you can also swipe the screen to the left or right to switch between the analysis and the graph of the measurement. 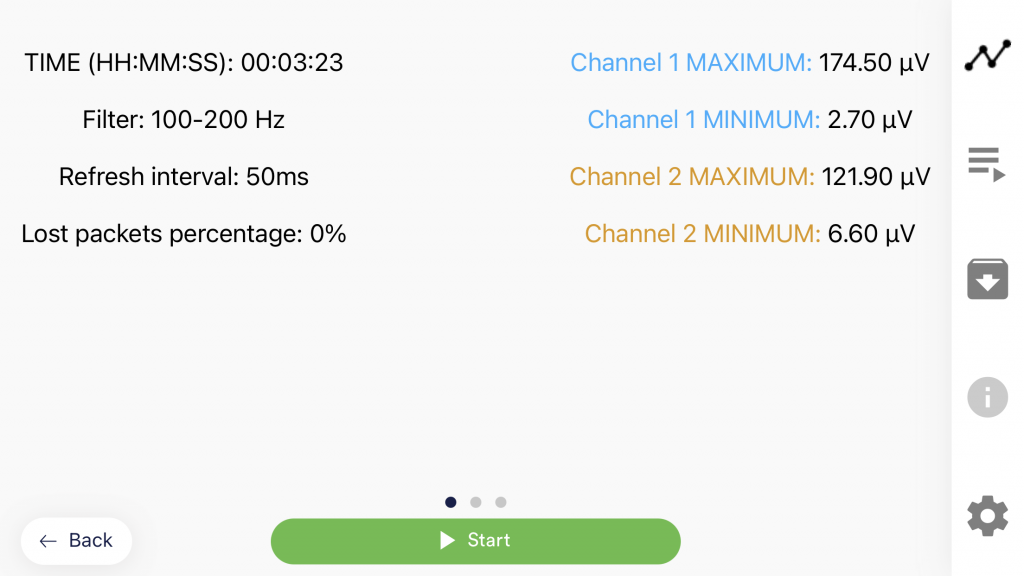 28. Procedure Overview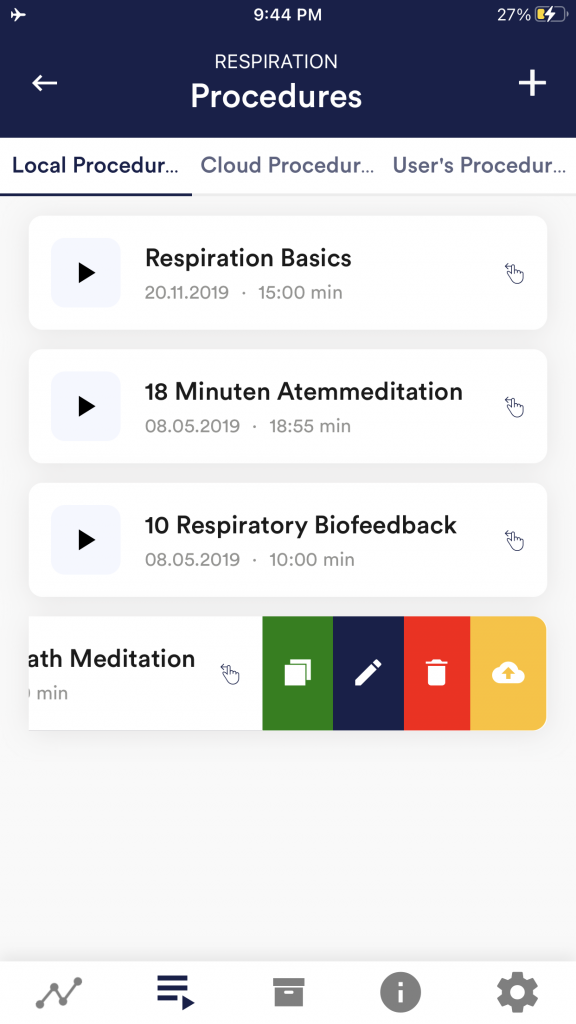 Edit or delete procedure To edit a procedure, simply swipe it to the left in the overview. You can then tap the blue pen-symbol to edit the module. If you want to copy the procedure, tap on the green copy-symbol. By touching the red trash symbol, you can delete the module. 29. Procedure editor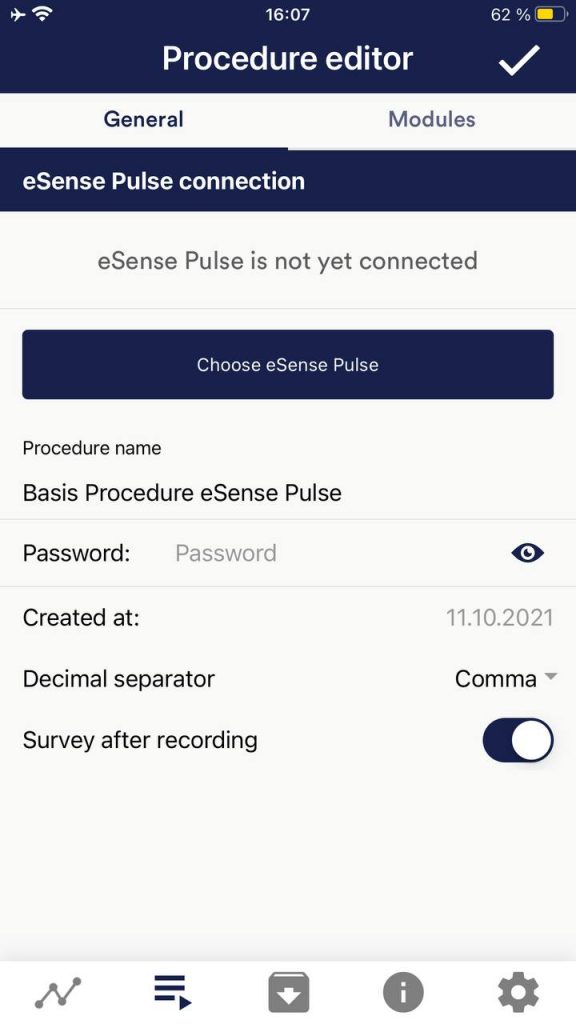 Procedure name Password (optional) Decimal separator Survey after recording 30. Add new module In the procedure editor, select the “Modules” tab. Add module to procedure Edit module 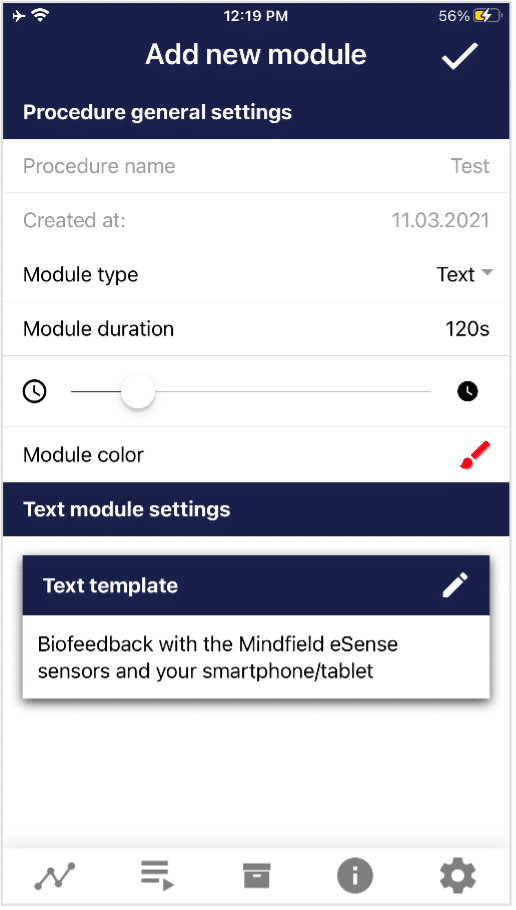 Module Type Module duration module color 31. Overview of the modules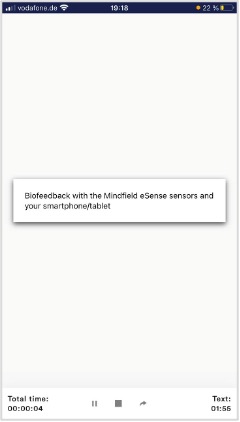 This module shows a text which you can edit. 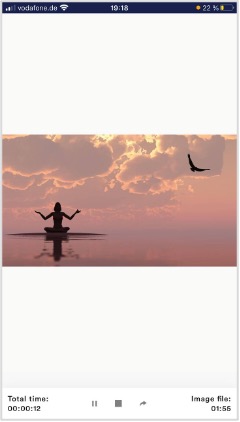 The picture module shows either a standard picture from the app or a picture from your gallery.  In the video module, you can choose either the standard video from the app or use your own video. 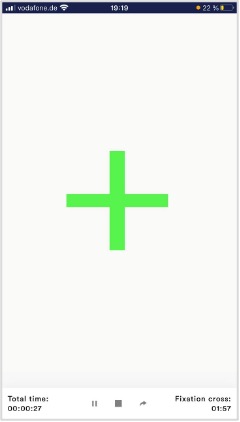 The cross changes its color depending on the conductance and provides direct biofeedback. 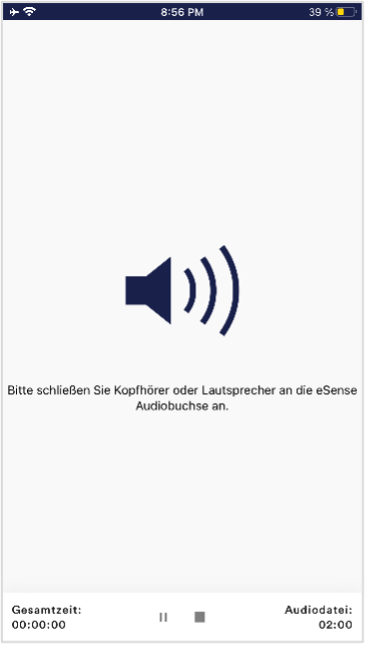 The audio module is playing a relaxing song. You can choose your own music. 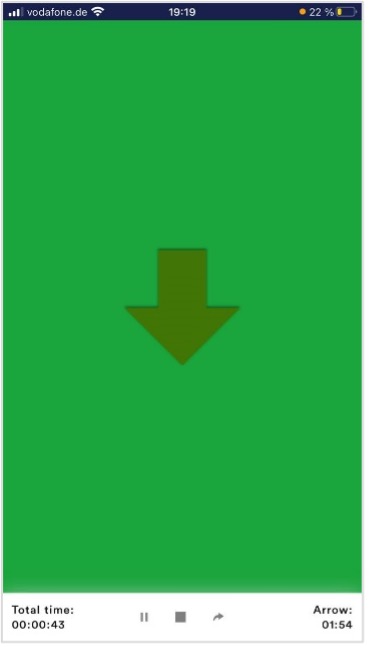 The arrow changes depending on relaxation and gives you direct biofeedback. 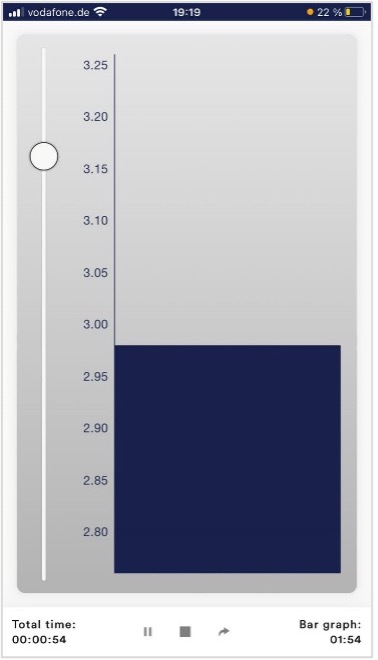 The bar graph shows you your current value and gives you direct biofeedback.  The procedures can be displayed also in landscape format. 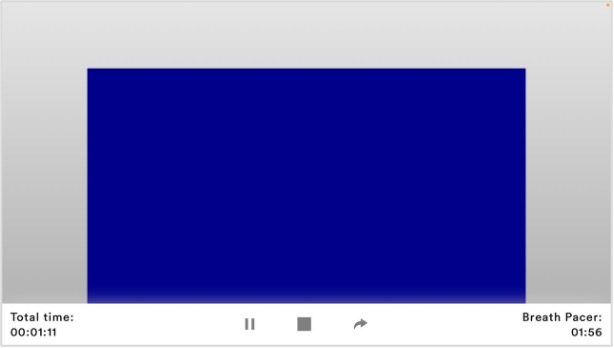 Breath Pacer module in landscape format 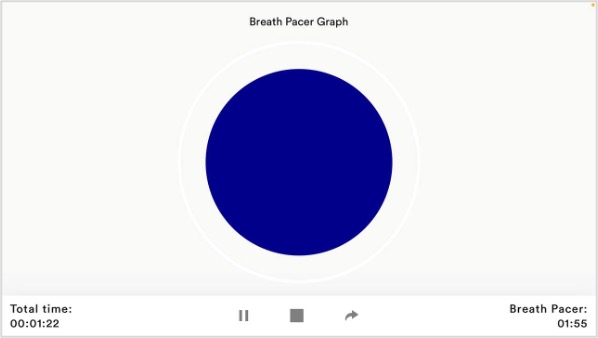 Osciloscope Type Breath curve (Sphere) 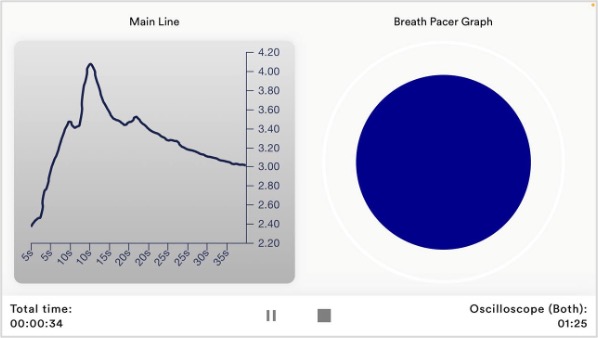 Osciloscope Type Both 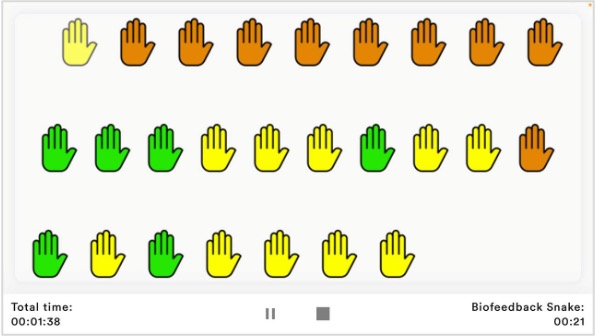 Biofeedback Snake The Biofeedback Snake is also available as module. 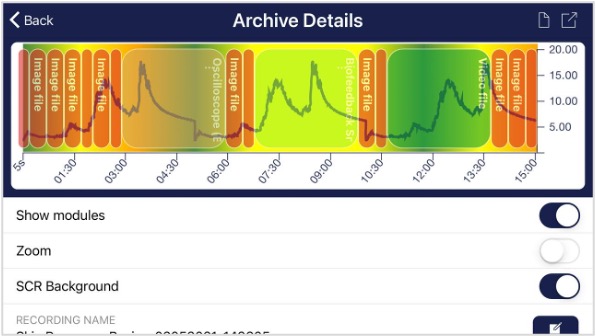 Procedure in the archive 32. Creation of a procedure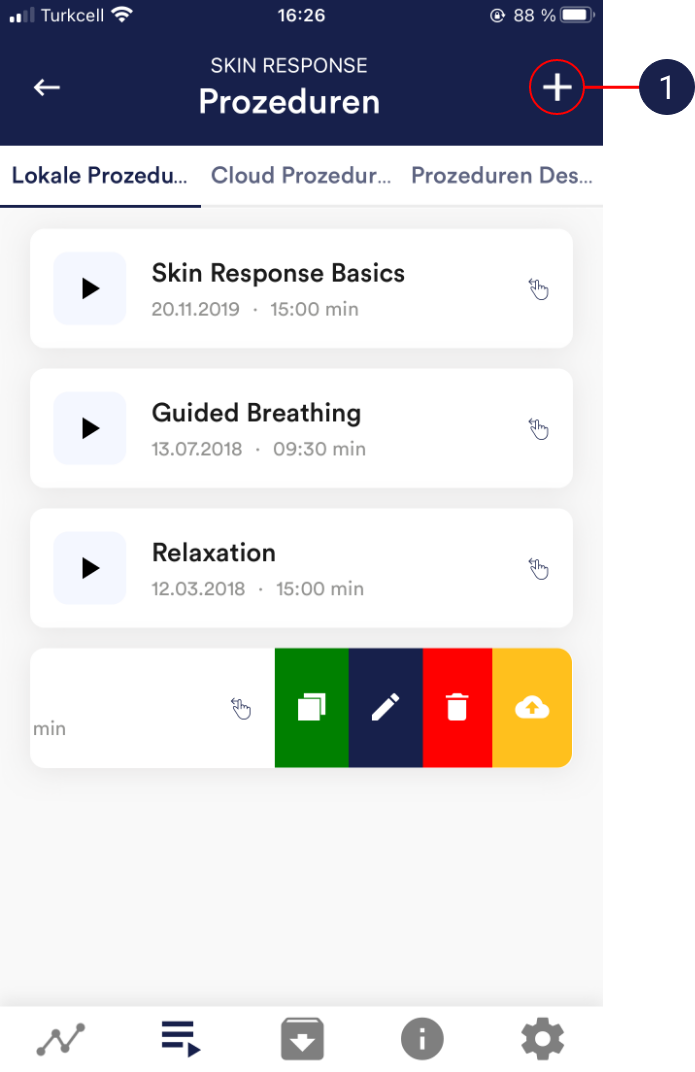 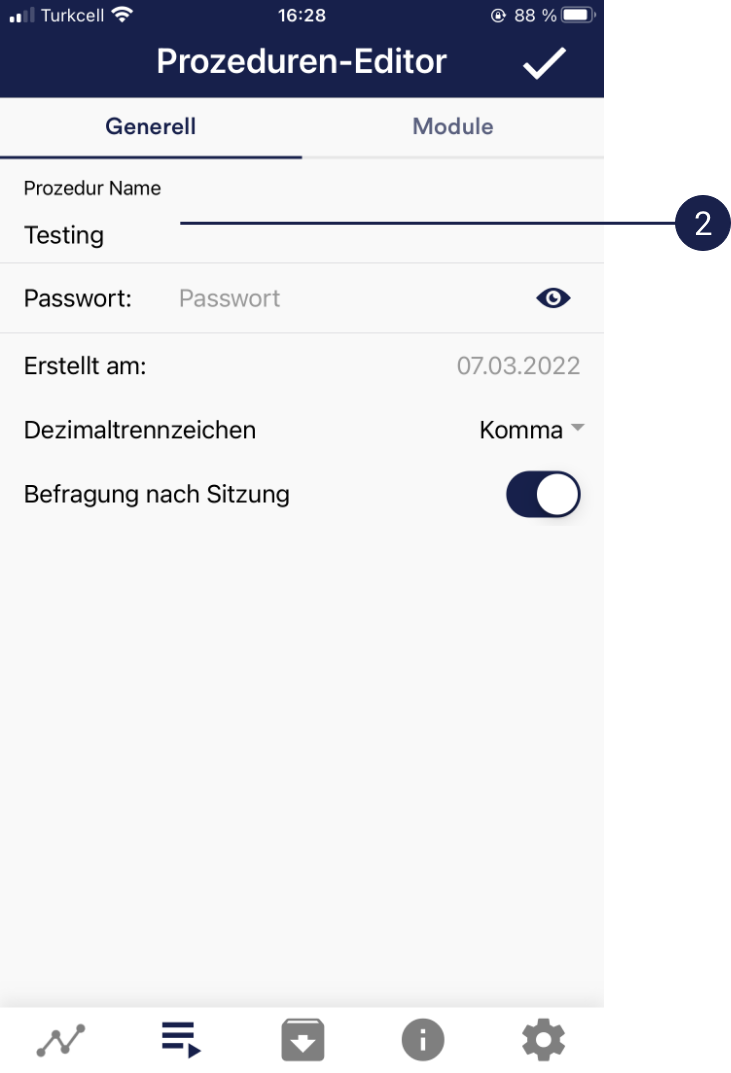 You can simply accept all other default settings for this example. 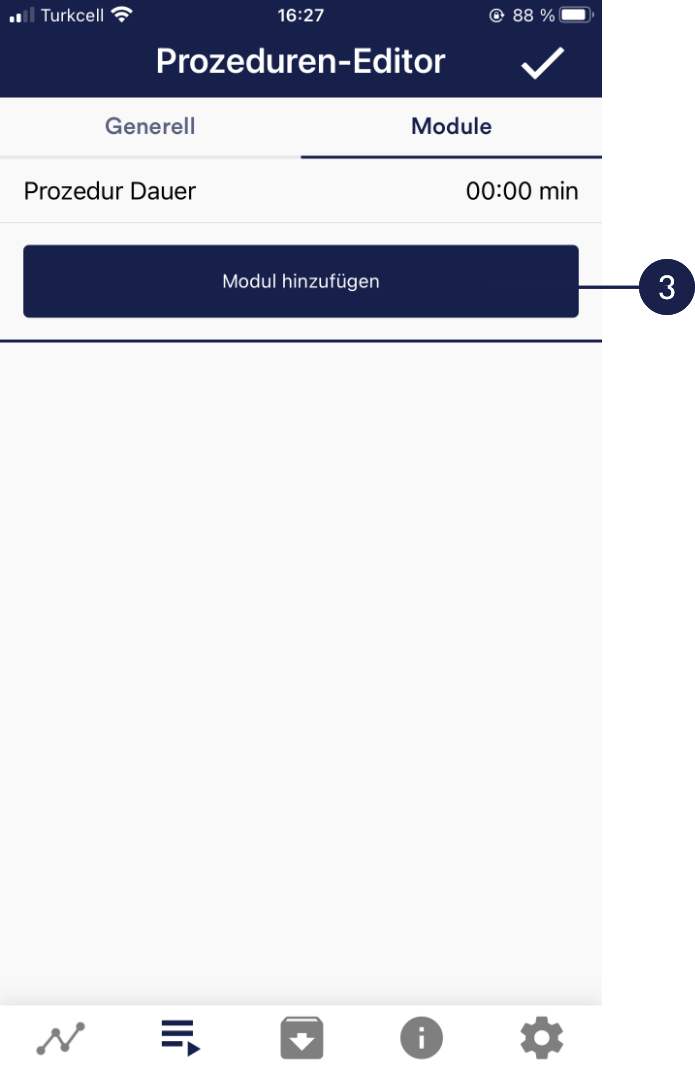 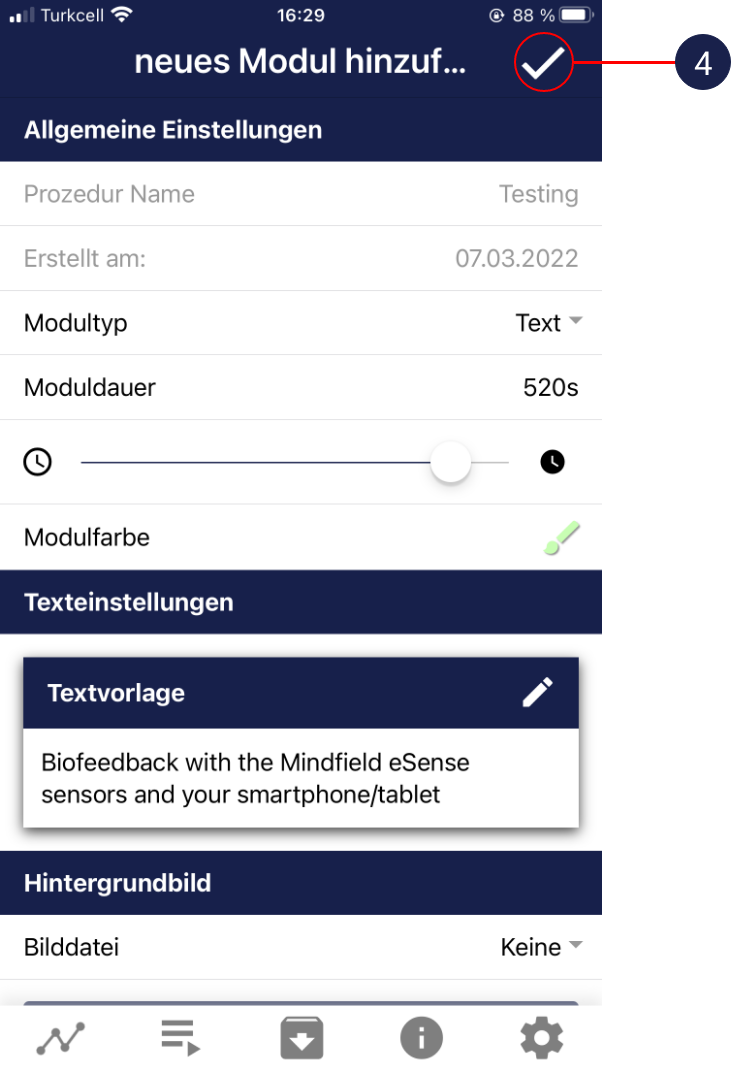   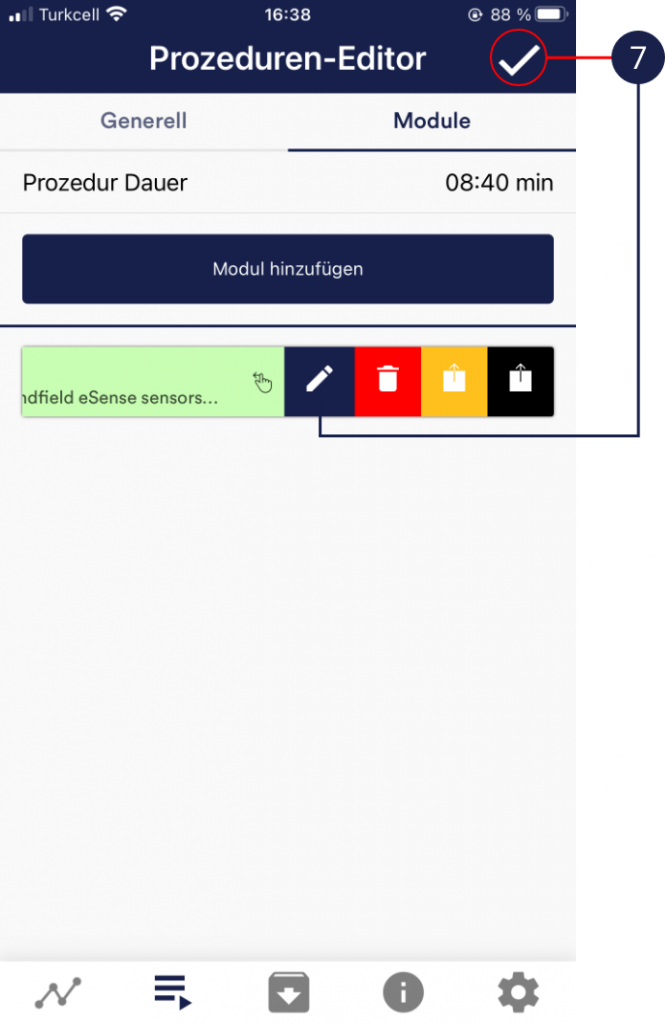  33. Own media (photos, videos and audios)You can use your own pictures in the picture module, your own videos in the video module or your own music or melodies in the audio module in the procedures. Android usually enables this without any further problems. As long as you allow the eSense app to access your files on your device, you can upload them to the eSense app. iOS is a bit more restrictive. As usual, you can use your pictures from your device in the iCloud for pictures and videos. For audio files you need iTunes (or an alternative such as “CopyTrans Manager”). This is where your music or melody must be. You can find your music in iTunes (or CopyTrans Manager) under the tab “My Sound” and insert it into your procedures. We have a detailed video at https://www.youtube.com/watch?v=A_CRbmBeBBc where we show all the steps. On iOS the power saving mode must also be deactivated, otherwise the videos in the procedures cannot be played. 34. General settings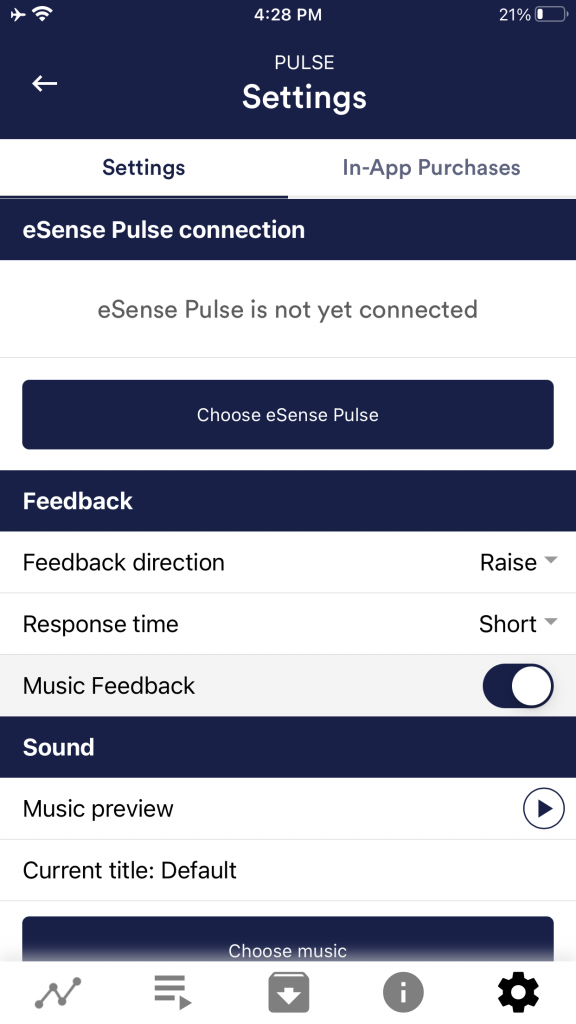 eSense Pulse Connection Feedback direction Response time Music Feedback Music preview Choose Music Music feedback type 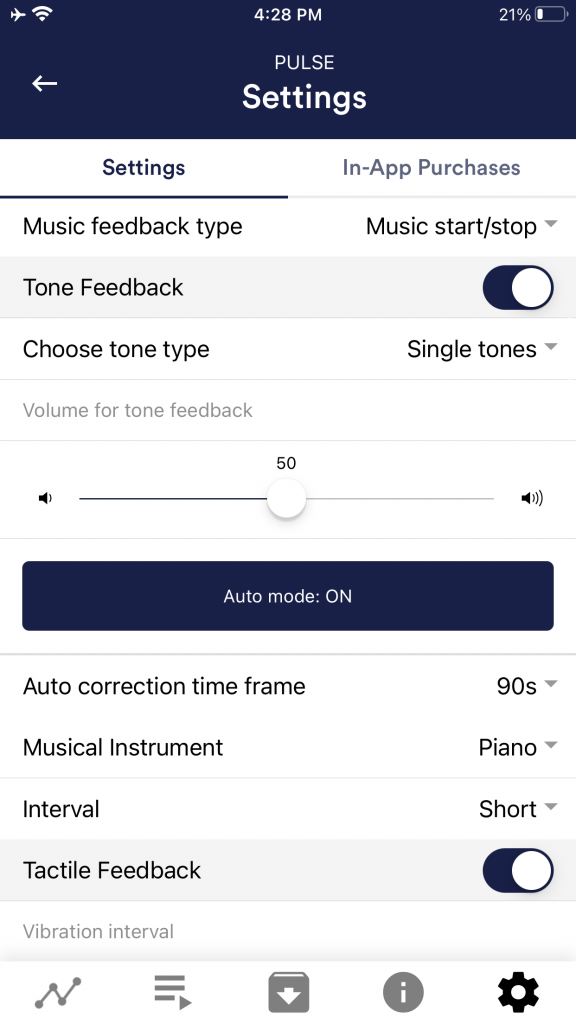 Tone Feedback Choose tone type Tactile Feedback 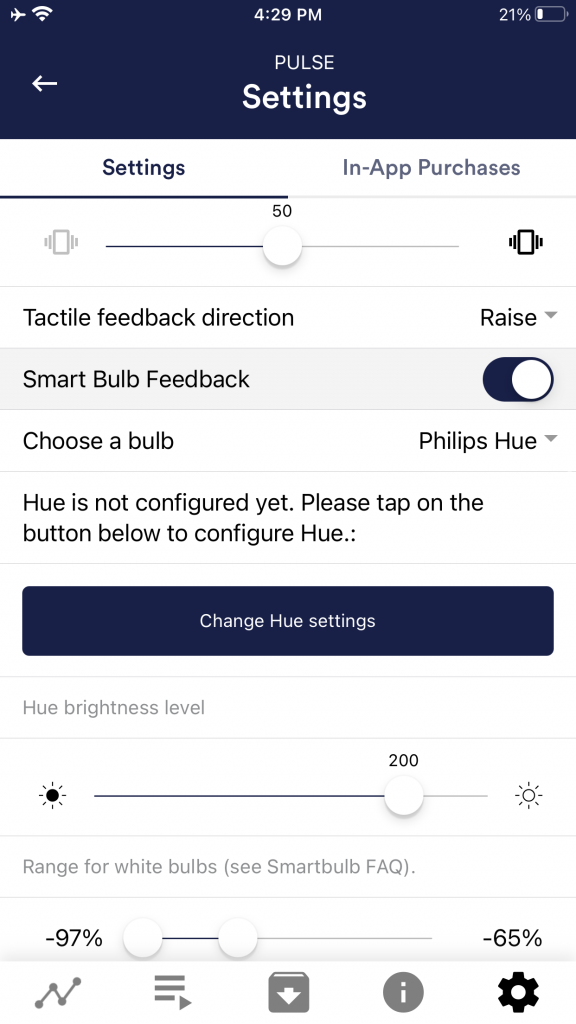 Tactile feedback direction Smart bulb feedback Choose a bulb 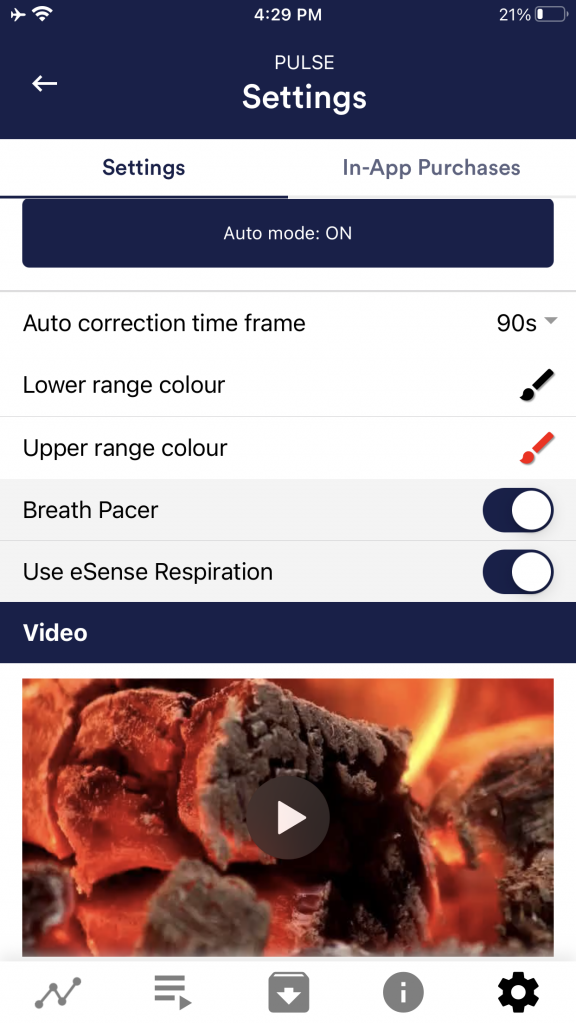 Breath Pacer Use eSense Respiration Breath pacer type Enable audio tone Inhale time / exhale time 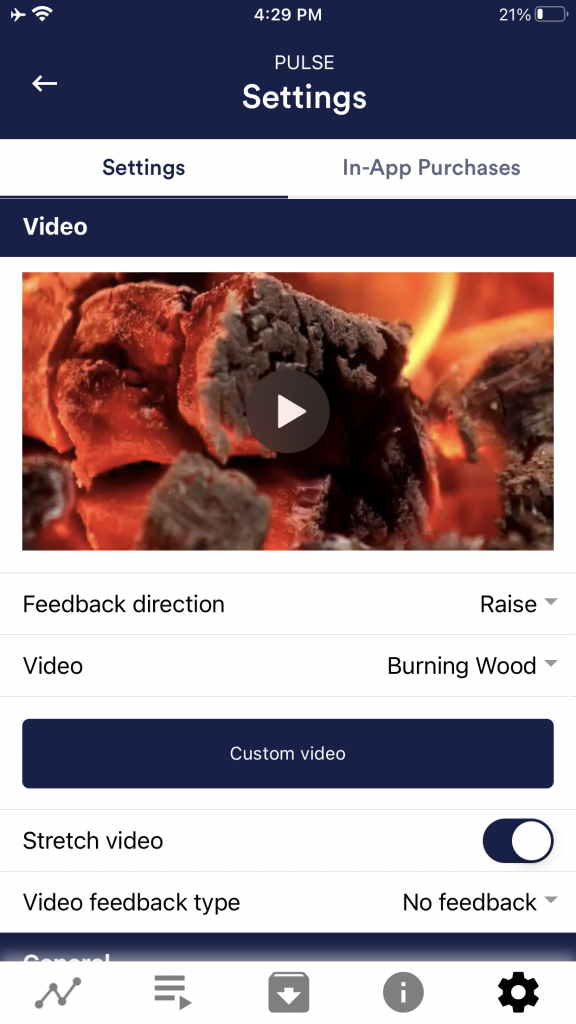 background image Inhale color / exhale color Video Video Feedback Type 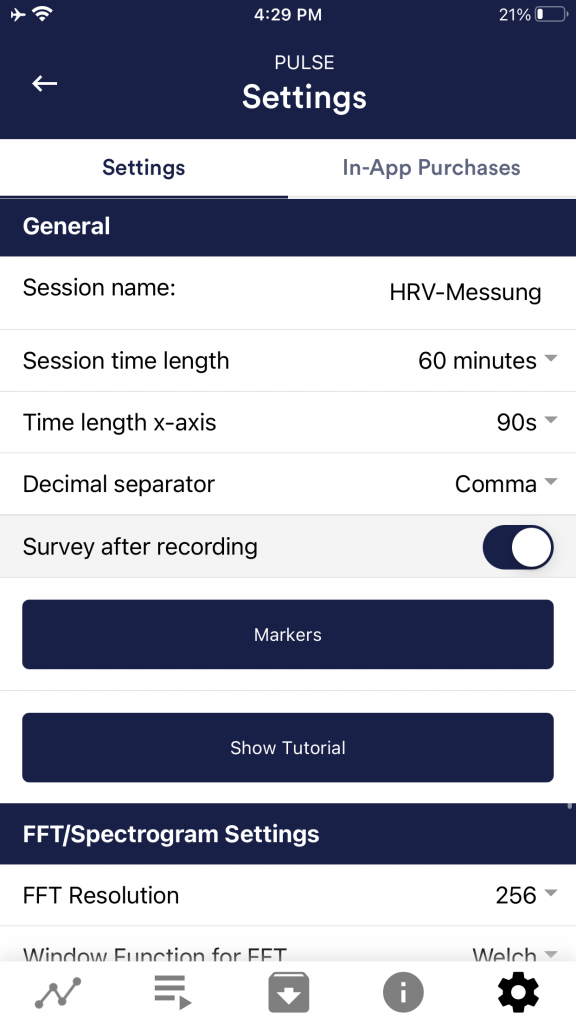 General: Session name Session time length Time length X-Axis Decimal separator Survey after recording Markers Show tutorial FFT resolution 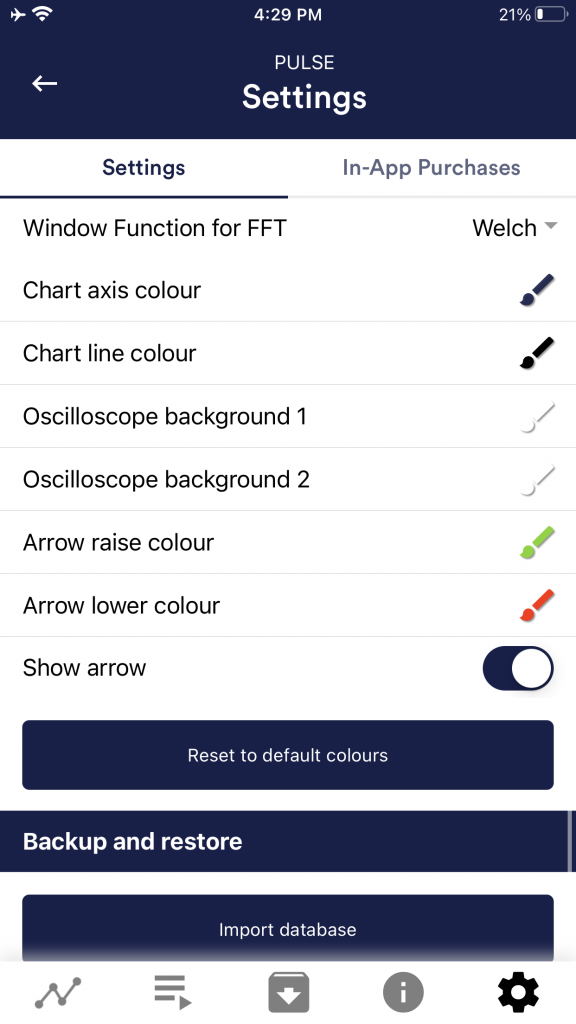 Window function for FFT Chart settings Chart axis color Chart line color Oscilloscope background 1&2 Smoothing of oscilloscope curve Reset to standard colors Arrow raise / lower color 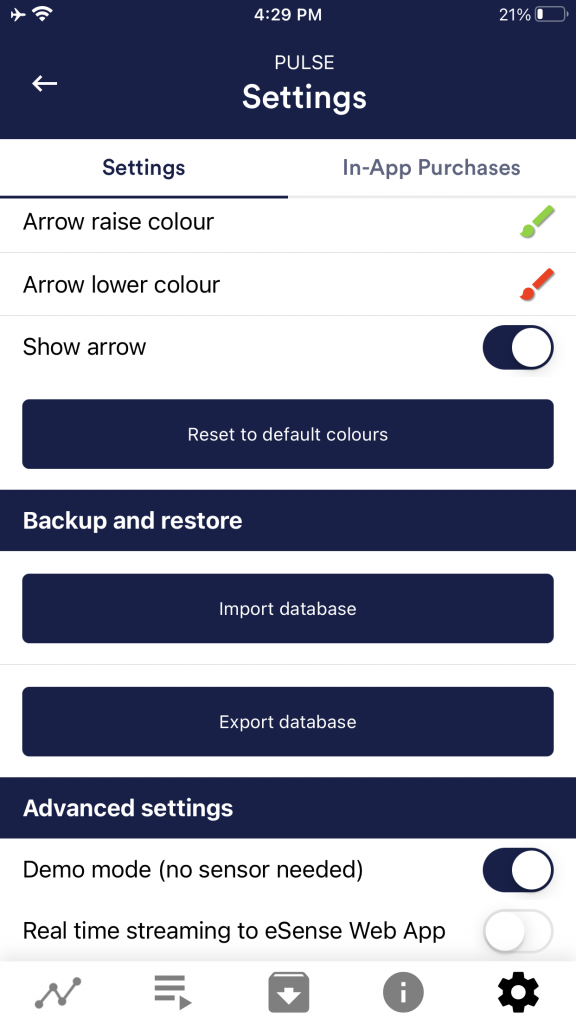 Backup & Restore Demo Mode
35. In App Purchases In-App Purchases 36. Archive (overview)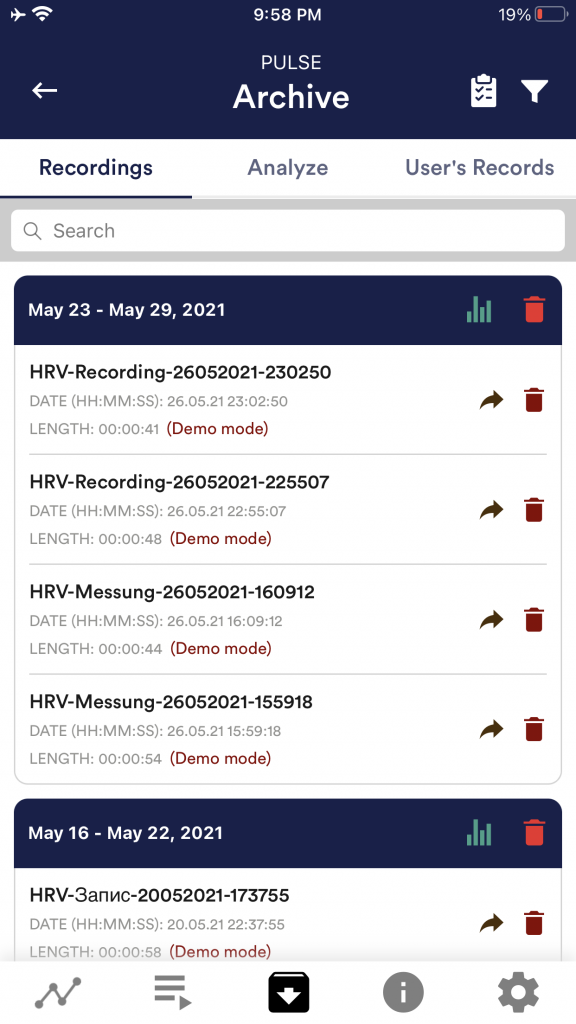 The app also contains an archive, in which you can save your measurements and export them as well. You can watch those in detail again, compare them to each other and export them individual or all together (as ZIP file). Recordings If you click on the clipboard symbol at the top right, you can mark one, several or all measurements. You can then export, analyze or delete the exported measurement (s). On the filter symbol you can choose whether you want to sort the measurements by name, date, length in ascending or descending order. If you want to delete a single measurement from this list, you can also tap on the trash can symbol to the right of the measurement. 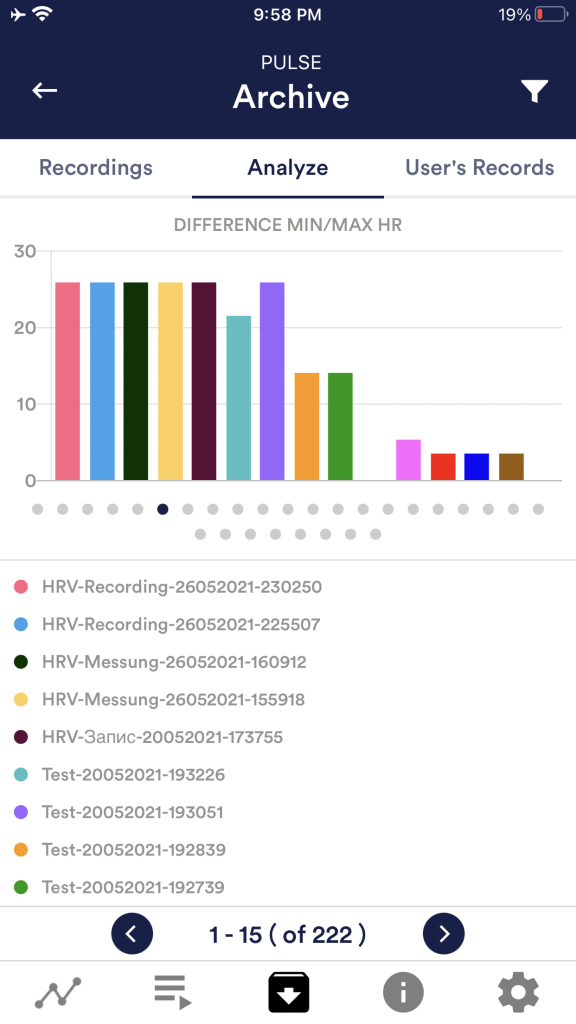 Analyze Time, score, average of session HR, minimum HR, maximum HR, difference min/max HR, SDNN ms, RMSSD ms, NN50, pNN50 %, stress index, average RR ms, Average HR. With this, you can recognize trends over time and over several measurements (if, for example, your % of SCR of Session decreases by regular training, you can see this here immediately). 37. Archive (single view)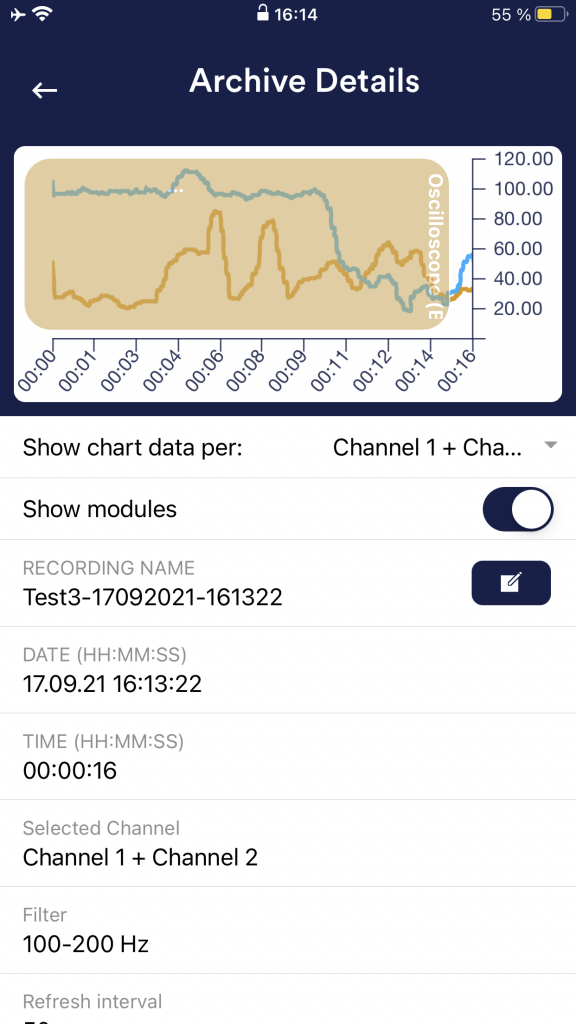  Export data Thanks to our export functions at the bottom of a recording, you can export the recordings in PDF or .csv format with all common apps (e.g. send via Messenger, WhatsApp, e-mail, etc.) or simply save them on your phone or in your cloud. The data are exported as a.csv-file (comma separated values). This format can be opened with Microsoft Excel or Open Office Calc (for free). If you like to work with Google, Google Sheets can be an alternative to Excel for you. You can open your exported .csv-files, visualize and access them via the cloud easily from several devices. Google Sheets has almost the same functions and interface as Excel. Note: We have also summarized more detailed information on CSV export and processing your data in an extra article on streaming and analyzing eSense data. 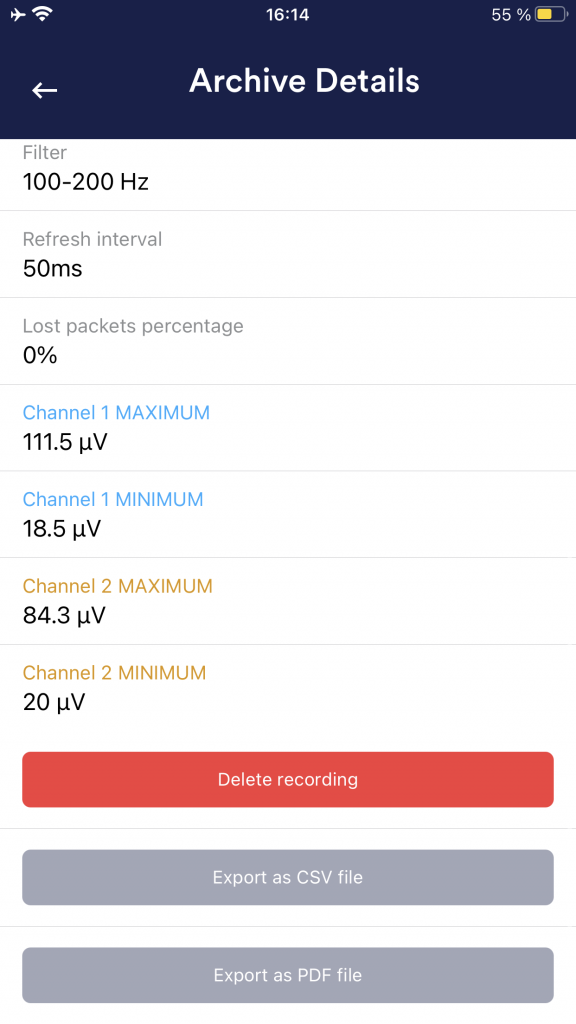  In Excel™ or Google Sheets™ Notice: If you open the .csv-file with Excel™ (or Google Sheets™) and your values make no sense, then there is usually a different set language in the eSense App and Excel™ and Sheets™. Note: We have also summarized more detailed information on CSV export and processing your data in an extra article on streaming and analyzing eSense data.  38. Marker featureYou can also set markers while you make measurements. For example, if you have a regular biofeedback exercise which involves breathing calmly at a specific point, you can set a marker in that moment when you breathe calmly. Later in the exported data, you can see the moment where you had breathed calmly. The marker feature comes in handy when you are making longer measurements with several actions. The markers can be displayed well in Excel: 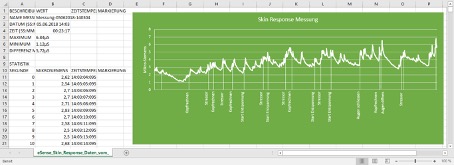 39. Virtual Reality (VR) (f.i. Meta Quest 3)All our eSense sensors and our eSense app also work with VR (virtual reality) glasses. The prerequisite for this is a USB-C adapter (our recommendation: https://amzn.to/40eCoLR), which we now recommend anyway and which you can also order directly from us in the store with an eSense. The eSense app can be used as normal, with all its functions. After the one-time setup with SideQuest, no further special adjustments need to be made. In particular, the graph of the measurement as well as the photos and videos of the biofeedback training can be viewed in impressive detail with the VR glasses. We have created a video that shows the best way to use it: 40. Compatible Android and iOS devicesGeneralNote for all eSense: If you don’t have a device yet and/or want to buy an extra device for the eSense, we recommend depending on your taste either
or
According to our research, these options offer enough power for the eSense app, will remain upgradeable to the upcoming Android and iOS versions for some time, and are still reasonably priced. The Android devices also still have a normal 3.5mm jack input and do not require an adapter for the eSense. Starting from the iPad 10th generation (2022), the iPad Pro 3rd generation (2018), the iPad Air 4th generation (2020), and the iPad mini 6th generation (2021), iPads no longer have a 3.5mm headphone jack. From these models onward, you will need an adapter for the eSense. More information can be found in the general notice below under iOS. iOS devices compatible with the eSense
General note: Alternatively, you can use any other adapter with a DAC chip. We recommend this adapter on Amazon: https://amzn.to/2SnAUA1. We tested 11 alternative Lightning adapters from third-party vendors – only two of them worked. Therefore, we recommend either the original Apple Lightning adapter (https://www.mediamarkt.de/de/product/_apple-mmx62zm-a-2179668.html) or this compatible Lightning-to-3.5mm adapter, which we have successfully used with the eSense and also offer in our shop: Compatible Apple Lightning to 3.5mm adapter https://mindfield-shop.com/en/product/compatible-apple-lightning-to-3-5mm-adapter. Additional note Siri: Note for iOS devices and the eSense Pulse: Note for iOS 7 and later and the eSense Respiration, Skin Response, and Temperature: 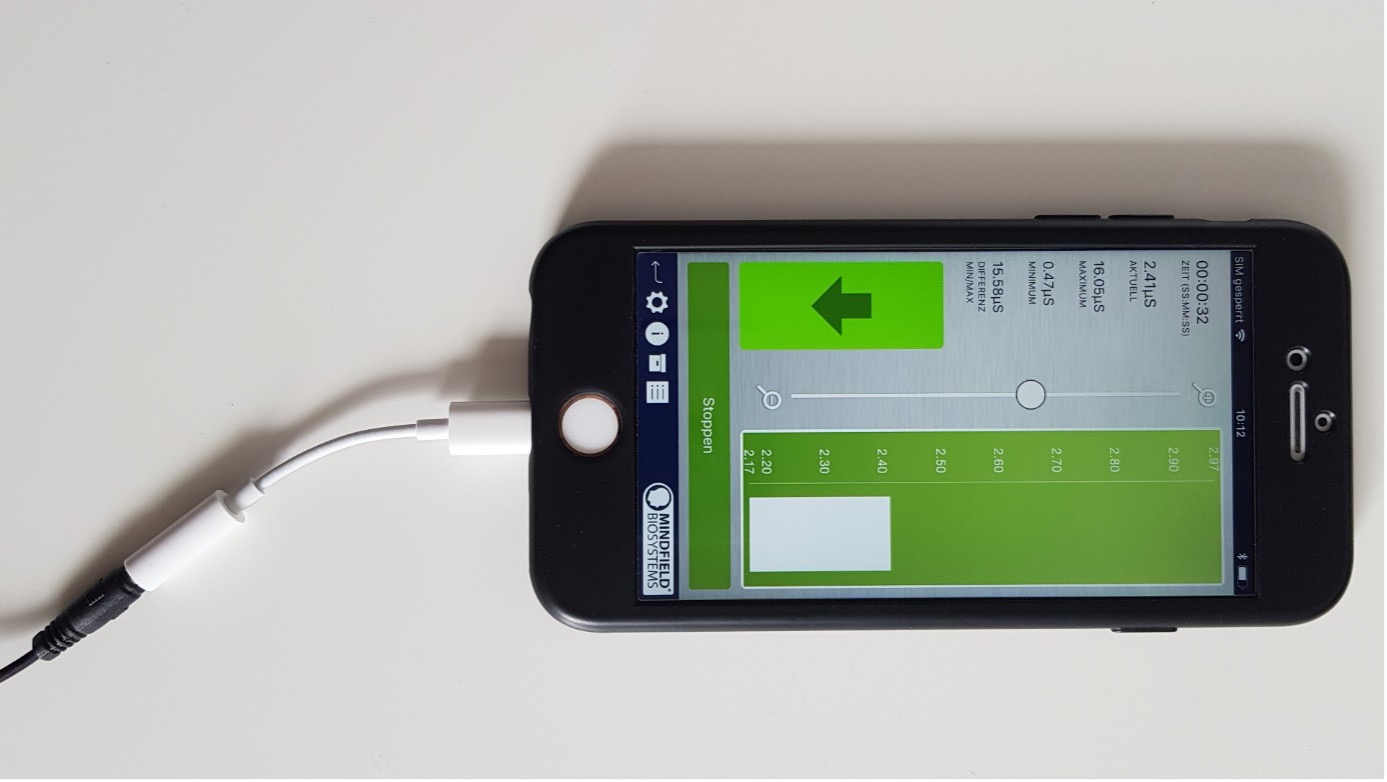 which no longer has a 3.5mm headphone jack, e.g. the iPhone X) Android devices that are compatible with the eSense
Important note about Android devices for the eSense Pulse: Important note about Android devices for the eSense Respiration, Skin Response and Temperature: Alternatively, you can use any other adapter with a DAC chip. We recommend this adapter on Amazon: https://amzn.to/2SnAUA1. Below are some Android devices that we have tested with the eSense Pulse, Respiration, Skin Response and Temperature and which work fine (whitelist). (Please note that this is only a very small sample and that the vast majority of devices worldwide work with the Mindfield eSense).
The following Android devices are NOT compatible with eSense Respiration, Skin Response and Temperature (blacklist). This list is not necessarily exhaustive. If you are not sure if your device is compatible, check if the microphone input is present as described above!
It is possible that these devices will work after all if you use the devices’ USB-C port instead. You can use a USB-C to 3.5 mm jack adapter for this purpose: https://amzn.to/2SnAUA1. 41. eSense Muscle Web App (recommended)Desktop Devices (Windows, Mac, Linux) (recommended)For the first time, the eSense Muscle comes with new software—a web app that runs exclusively in a web browser. You do not need to install any software. All you need is:
We recommend that you use the latest version of Google Chrome. Mozilla Firefox and Apple’s Safari are NOT SUPPORTED! So, if you have a computer with Bluetooth® and one of the mentioned browsers, please go to the website: https://esense-muscle.comYou can then launch the web application on this web page and get further instructions on how to use it (please watch the instruction video). You then connect directly to the (switched on) eSense Muscle via Bluetooth® in your web browser.You are offered different representations of the measurement (oscilloscope, different animations, different games, etc.) We update the eSense Muscle Web App regularly. You are offered different representations of the measurement (oscilloscope, different animations, different games, etc.) We update the eSense Muscle Web App regularly. Mindfield eSense Web App for mobile devices (Android or iOS)For the first time, the eSense Muscle comes with new software—a web app that runs exclusively in a web browser. This is also usable for mobile devices, but we recommend using the Mindfield eSense Mobile App once it supports the eSense Muscle. To use the web app on mobile devices (smartphones or tablets), you need:
On Android, you need to use “Google Chrome” for this. On iOS, Web Bluetooth® is not supported by Safari. You need to download the app “eSense Muscle” from the Apple App Store, a minimal browser that supports Web Bluetooth®. It will take you directly to our website after the start:  iOS: https://apps.apple.com/app/esense-muscle/id1563762101 If you are using Google Chrome on Android or the “eSense Muscle” app on iOS, please navigate to: https://esense-muscle.comYou can then launch the web application on this web page and get further instructions on how to use it (please watch the instruction video). You will then connect directly to the (switched on) eSense Muscle via Bluetooth® in your Chrome browser on Android or the “eSense Muscle” browser app on iOS. You are offered different representations of the measurement (oscilloscope, different animations, different games, etc.). We update the eSense Muscle Web App regularly. We recommend using the desktop version of the eSense Web App with a desktop PC, notebook with Windows, Mac or Linux. The mobile version of the web app comes with reduced content due to technical reasons. 42. Account and CloudYou can register your own, free account for the eSense app and book plans. You can also benefit from free, regularly added procedures without booking a plan. Thus, we recommend using the app with an account. With the plans you can mainly use the cloud and its functions and get also access to the eSense web app at https://esense.live. With the Basic Plan, you can save your measurements locally and online in the cloud and thus access your measurements from all devices and from anywhere. You also get access to the eSense web app. The Premium Plan includes all functions of the Basis Plan. In addition to your measurements, you can also save your custom procedures online in the cloud and thus access your procedures from all devices. (Attention: Technical limitations from Apple unfortunately do not allow the upload (and thus the synchronization) of audio files. The synchronization of picture and video files is possible, however). You can buy the Premium Plan here: https://mindfield-shop.com/en/product/premium-plan-for-esense-app-for-all-esense-sensors-annually/ There is also the Supervisor Plan. As a professional or commercial biofeedback trainer, you can use it to create individual procedures for your clients and share them with them via the cloud. You can buy the Supervisor Plan here: https://mindfield-shop.com/en/product/esense-supervisor-account-monthly-subscription-for-esense-app-and-esense-live You can also share your measurements with other users. You also have the option of transferring your data to the eSense web app in real time. To do this, activate “Real-time data transfer to eSense Web App” at the bottom of the settings.   These plans can be used, among other things, to design a trainer’s client’s workflow. You can find an overview of the account and the cloud in our account comparison article. You can book the plans in our app in the profile tab: 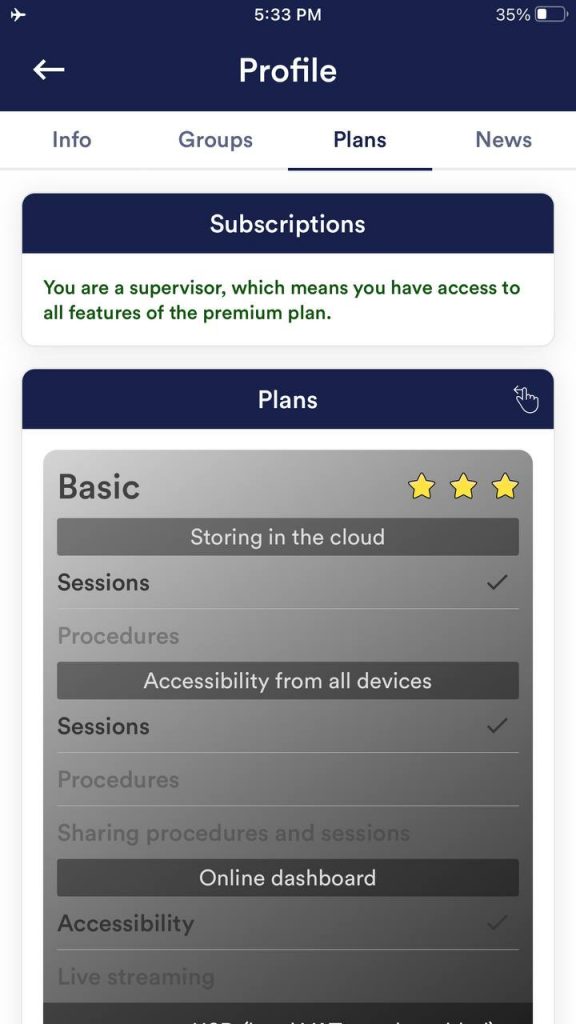 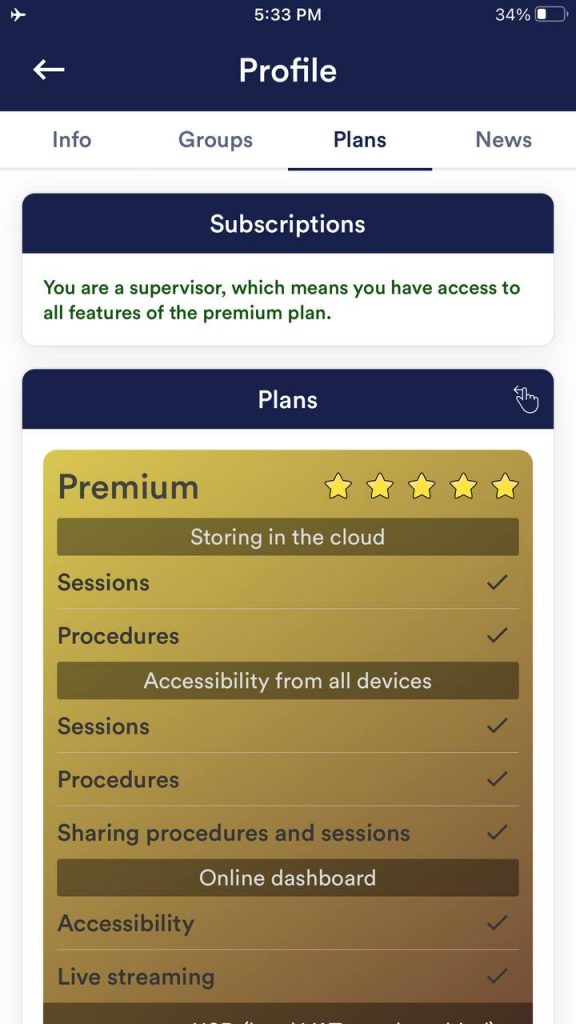 43. Account ComparisonNote: Scroll the table left or right on mobile devices
2) Sharing with other users or groups possible 3) Sharing with other users possible Example cases for the different accountsSUPERVISORThe professional or commercial biofeedback trainer has a SUPERVISOR account so that he can create individual procedures for his clients and share them with them via the cloud. They can also create different groups and add their clients to them individually. This allows them to monitor and analyze their clients’ measurements over a longer period of time. You can buy the Supervisor Plan here: https://mindfield-shop.com/en/product/esense-supervisor-account-monthly-subscription-for-esense-app-and-esense-live/ PREMIUM PLANThe client who wants to work with a (professional) trainer and have access to all functions has a PREMIUM PLAN. This allows the client to share their recordings (both free measurements and procedures) with the trainer and other users. They can also upload their own procedures to the cloud and have them analyzed or adapted by the SUPERVISOR (trainer). BASIS PLANThe client who wants to work with a (professional) trainer needs at least this account so that he can share his recordings with the trainer (SUPERVISOR). WITHOUT PLANAnyone who simply wants to get a taste of the app does not need to join a plan to test its functionality. Example cases for the synchronization of measurements between accounts with different plansWithout account, without plan (and offline)All measurements are saved locally on the device. There is no synchronization with the cloud as there is no associated account. Users can only access their measurements on the device on which they were carried out. You can find the measurements in the archive under the Recordings tab. With account, without planThe measurements are linked to the user’s account but are not synchronized with the cloud. All measurements that are linked to the user’s account are displayed in the archive. The measurements can only be accessed if the user is logged into the account on the device on which the measurements were taken. You can find the measurements in the archive under the Recordings tab. With account, with basic or premium planAll measurements are linked to the user’s account and are synchronized with the cloud. All synchronized measurements that are linked to the user’s account are displayed in the archive. To synchronize old measurements that were created on the device before a plan was purchased with the cloud, you can select the “Synchronize with the cloud” button in the “Local session, performed without account” tab in the archive. These measurements are then assigned to the other measurements and disappear from this tab. Activate streaming to esense.live in the eSense mobile appIf you are a supervisor, you can activate real-time data transmission to eSense Web App (esense.live) in the eSense app settings.   44. GroupsThe accounts enable you to create your own groups or to join other groups. This allows you to share your recordings with your friends. Or you can work with a trainer as a client since you can share your recordings with the trainer. 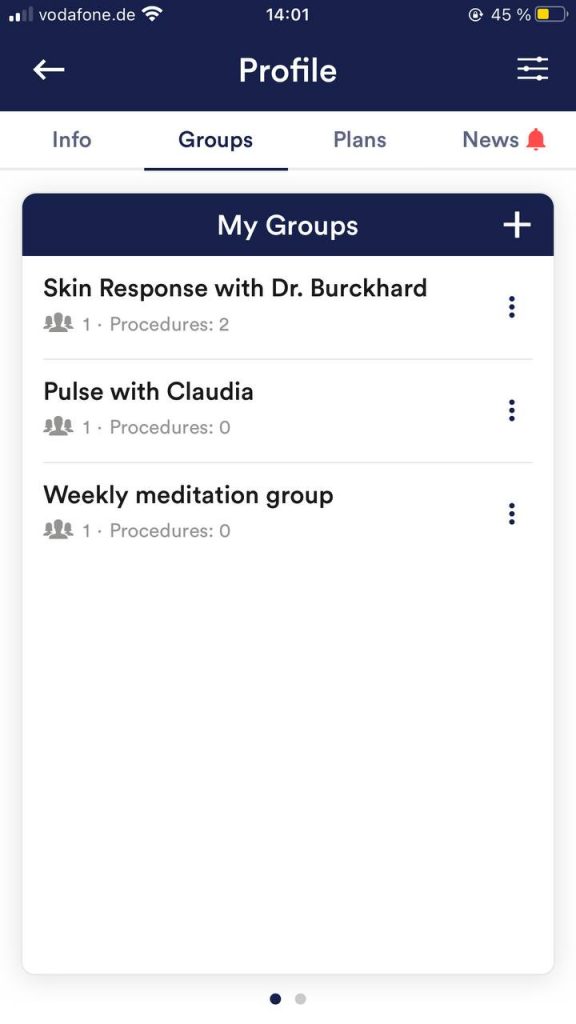 Create a group Tap on the plus symbol to create a group. Edit a group Tap on the 3 dots next to the group name You can then (if authorized) view and remove the members of the group or add new members. 45. Privacy policyThe eSense App does not collect any personal data, such as name, gender, date of birth, etc.. Each recording of measurement data is done under a general prefix such as “measurement”, supplemented by with the eSense sensor used, the current date and time of the measurement. The recorded measurement data cannot therefore be assigned to any person. The prefix of a recording, e.g. “measurement”, can be changed by the user in the settings and used for the assignment to a person. Users can decide whether to change this prefix to their name, for example. Then each measurement and also each CSV file exported from it contains the name of the user in the file name. Access rights within the eSense App
Transmission of anonymous usage data and crash reportsIn order to improve the technical stability of the eSense App and the detection of code errors, we use the Sentry service. Sentry serves these purposes alone and does not evaluate any data for advertising purposes. The transmission takes place anonymously and only with an existing internet connection. Processed data Usage data, metadata (device ID, device data, IP address). Special protective measures: IP masking, immediate deletion. External Functional Software Disclosure: Functional Software Inc., Sentry, 132 Hawthorne Street, San Francisco, California 94107, USA. Privacy Policy: https://sentry.io/privacy/. Processing in third countries: USA Warranty for processing in third countries: Privacy Shield, https://www.privacyshield.gov/participant?id=a2zt0000000TNDzAAO&status=Active. Deletion of the data: Information on the device or time of error is collected anonymously and is not used for personal purposes and then deleted. Medical information The Mindfield eSense sensors are not medical devices and may therefore only be used to reduce stress. If you suffer from an illness, do not carry out any treatment on your own and always consult a therapist. Warranty by the manufacturer The statutory warranty obligations apply to all our products. If you have any problems with our products, please contact us directly. See the “Contact” section of this manual. |
||||||||||||||||||||||||||||||||||||||||||||||||||||||||||||||||||||||||||