General settings
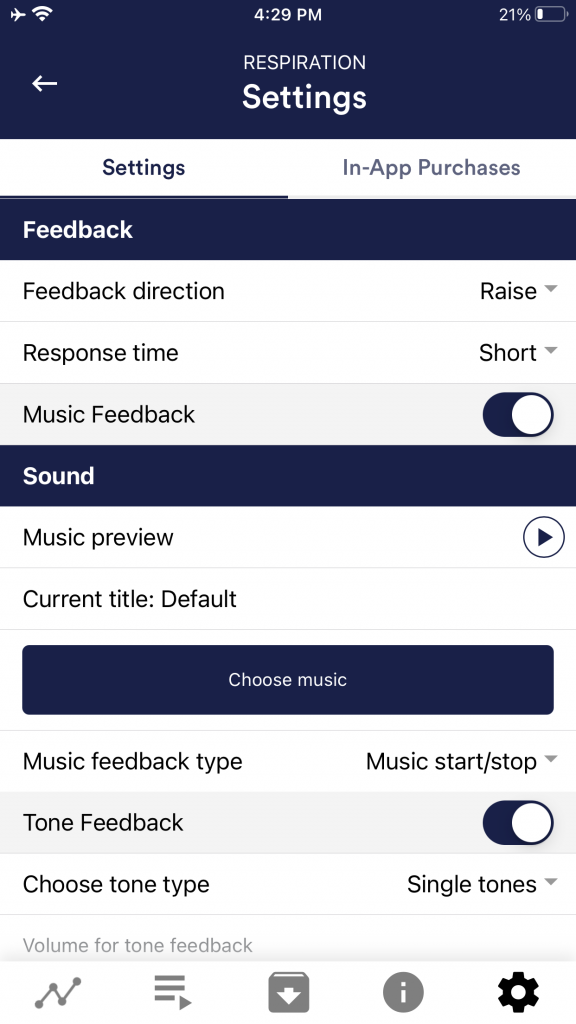
Feedback direction
Select the direction in which you want the feedback to react to. It can respond either to an increase or decrease in the measured values. The values increase when inhaled and decrease when exhaled. So, choose which breathing phase you prefer to occupy with positive feedback.
Reaction time
Set how sensitive the feedback should be to fluctuations. The default setting is “Short”, which allows feedback to respond quickly to changes in readings. For longer measurements we recommend “Medium” or “Long”, then the reaction time will be slightly delayed and the eSense will no longer react to every small change of the measured values.
Music Feedback
If the value moves in the unwanted direction (e.g., lower values), the music will become quieter or change its speed depending on the type of feedback you choose.
Music preview
Tap the Play button to listen to the selected song.
Choose Music
You can use the default or your own music.
Music feedback type
You can optionally choose between music start/stop, volume feedback or playback rate feedback. Note: For iOS are the options restricted.
Tone Feedback
In the background, you can hear sounds from other apps.
Choose tone type
You can choose between single or continuous tones.
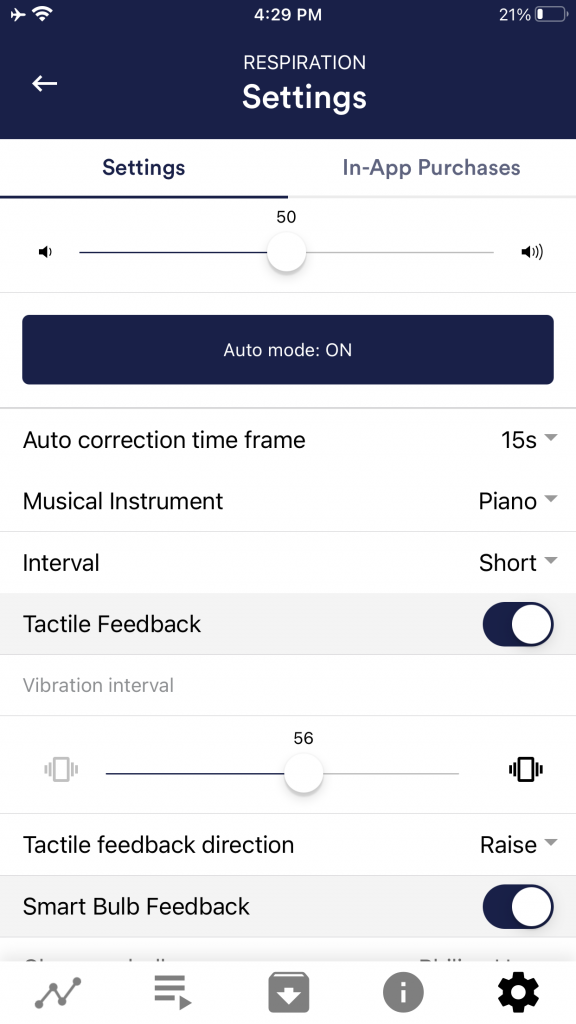
Auto Mode
When this is activated, the range in which the sound changes is automatically adjusted. The minimum and maximum values of the set time window are automatically used for the lower and upper limits of the following interval.
Value range from-to
(Not visible when auto mode is enabled)
You can set the area in which the feedback is active. We recommend selecting the range wide at the beginning and to set it smaller over time if necessary. Alternatively, you can use the automatic mode.
Auto correction time frame
(Only visible when auto mode is enabled)
You can specify the time window in which the automatic mode adjusts itself each time.
Musical instrument
You can choose from various preset instruments.
Interval
Set an interval for the tone feedback.
Tactile Feedback
Your device will vibrate to provide feedback. Only smartphones support this feature, tablets do not have a vibration motor.
Tactile feedback direction
Decide whether decreasing (“Decrease”) or increasing (“Increase”) tactile feedback values should be considered a success.
Smart bulb feedback
The light bulb changes its color depending on the values.
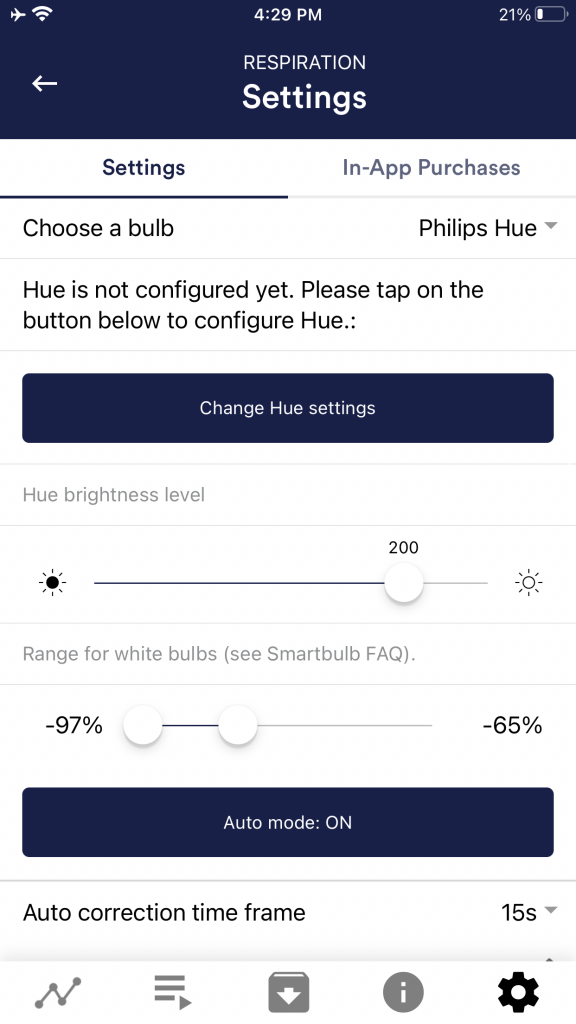
Choose a bulb
Choose between Magic Blue, Magic Blue V2 or Phillips Hue.Connection test
With this option, the bulb changes color if the connection is successful.
Connection test
With this option, the Magic Blue changes color if the connection is successful.
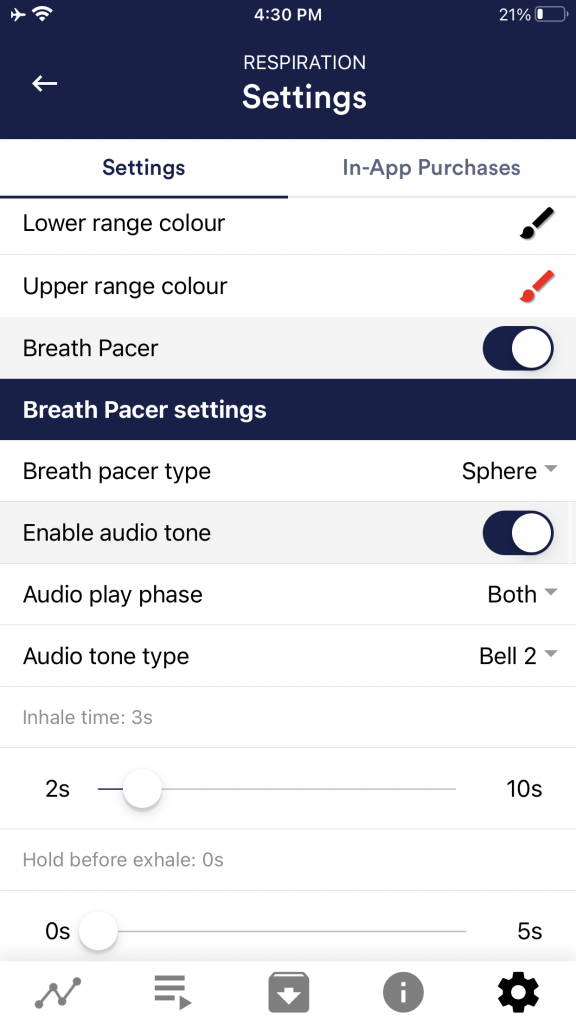
Breath Pacer
If activated, a breathing aid is displayed during the measurement.
Breath pacer type
You can choose between line and sphere.
Enable audio tone
Tones can also be added as auditory breathing aids.
Inhale time / exhale time
Select the seconds for each inhalation breath and exhalation breath to display the breathing aid.
Hold before inhale / exhale
Select the seconds between inhalation and exhalation breaths.
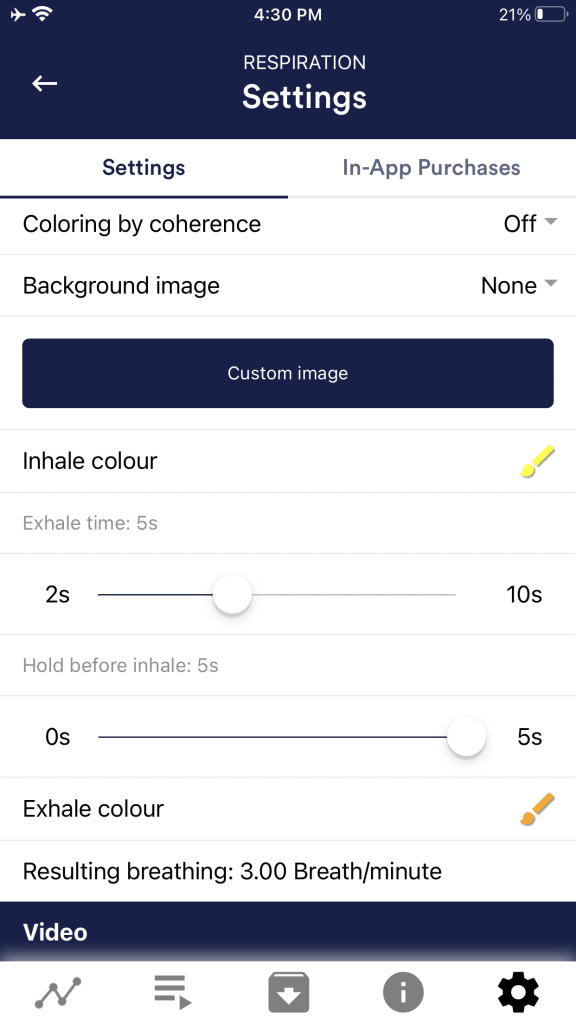
background image
You can choose a background image for the breathing aid.
Inhale color / exhale color
Select the color for each inhalation and exhalation stroke of the bar or ball.
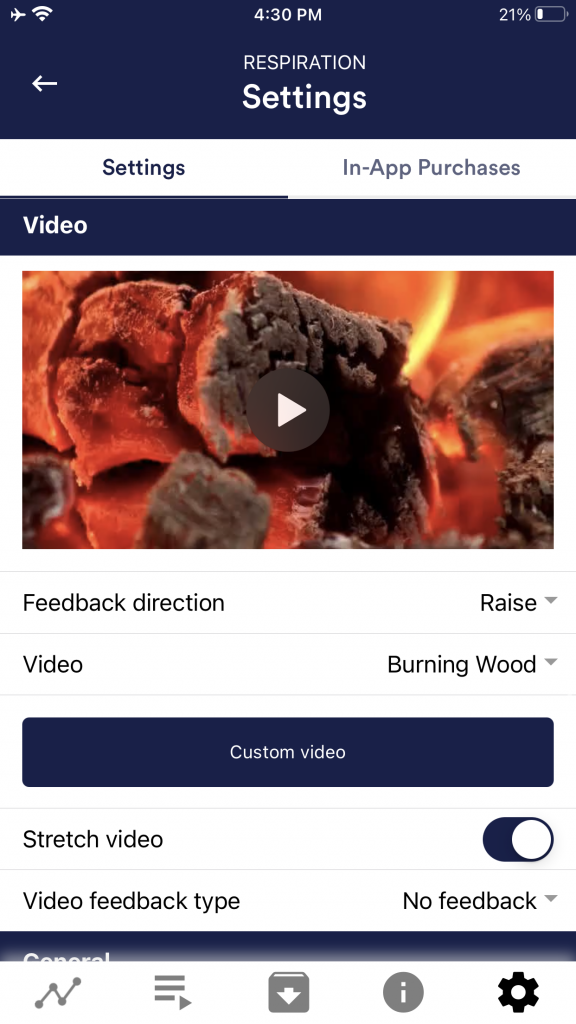
Video
Choice: In the dropdown menu, you can select from included videos and “Select your own video”. You can select your own videos from your device.
Video Feedback Type
Effects can be applied to the video as feedback. Sie können zwischen Start/Stop, Schärfe, Helligkeit und Sättigung wählen. You can choose between Start/Stop, Sharpness, Brightness and Saturation. In addition, the automatic or manual mode for selecting the upper and lower limits is then available for sharpness, brightness, and saturation. In between is then interpolated. “No feedback” is also possible, then the video is simply played.
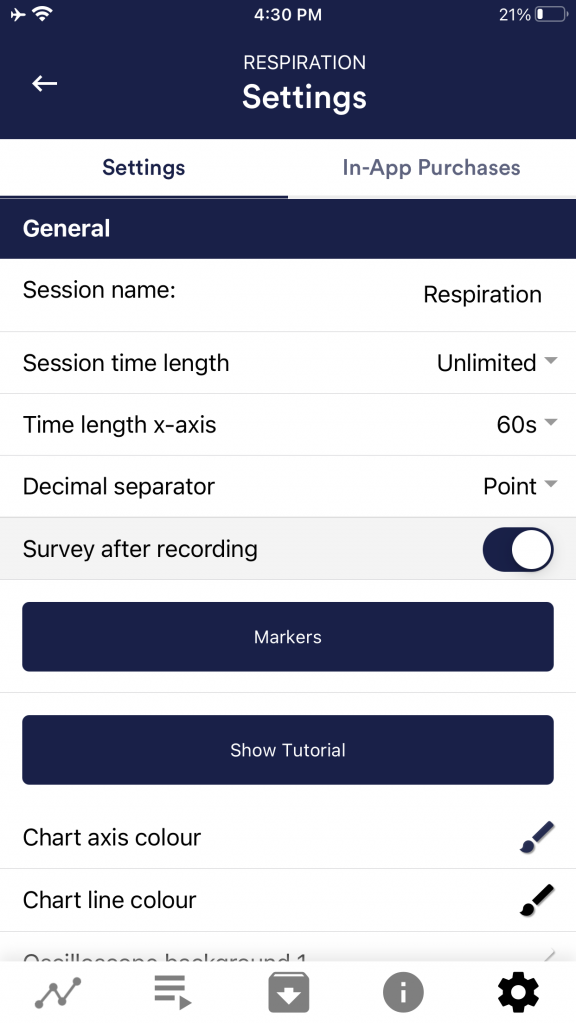
General:
Session name
Enter the name of your session which will be displayed in the archive here.
Session time length
You can automatically time-limit normal measurements. They stop automatically after the set time.
Time length X-Axis
You can set the time displayed on the X-axis of the oscilloscope. We recommend 90 seconds.
Decimal separator
You can choose between comma or dot.
Survey after recording
Here you can activate/deactivate the survey (position, electrode type, mood, notes) after each measurement.
Markers
You can define markers by tapping the button. These are the markers you can set during a measurement. (See also ‘Set Marker’ in Landscape mode of the general view above).
Show tutorial
You can watch the tutorial again at any time from the first start of the app.
Chart settings
You can change the colors of the graph and the oscilloscope in the general view.
Chart axis color
You can change the color of the chart axis in the main view.
Chart line color
You can change the color of the chart line in the main view.
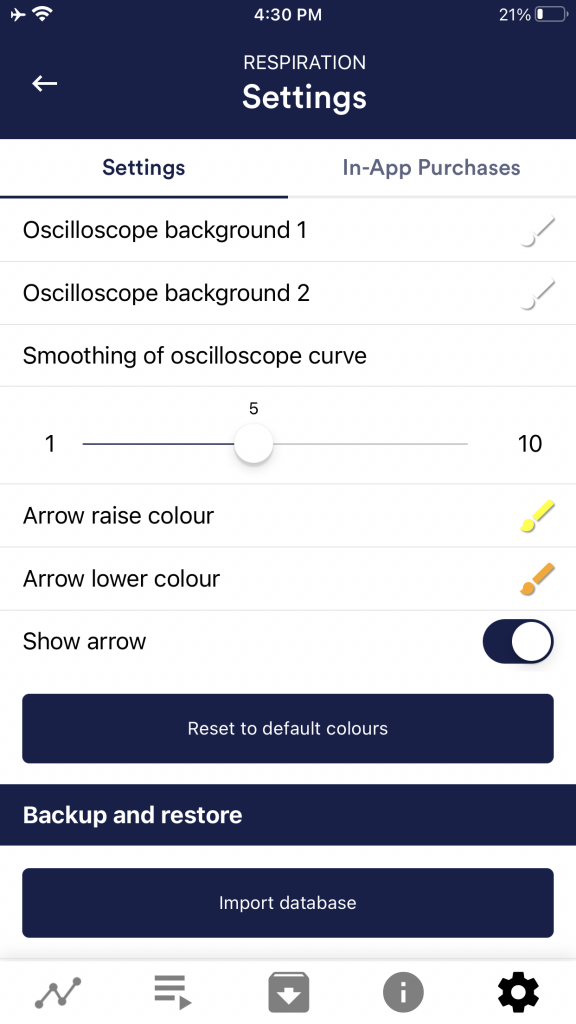
Oscilloscope background 1&2
You can change the background color of the oscilloscope in the main view.
Smoothing of oscilloscope curve
You can adjust the smoothing of the curve in the oscilloscope between 1 (hardly) and 10 (very strong).
Reset to standard colors
You can restore the default colors for the graph at any time.
Arrow raise / lower color
You can also disable the arrow in the main view.Show arrow
You can also disable the arrow in the main view.
Backup & Restore
You can export and import your procedures and measurements. More about this in our FAQ
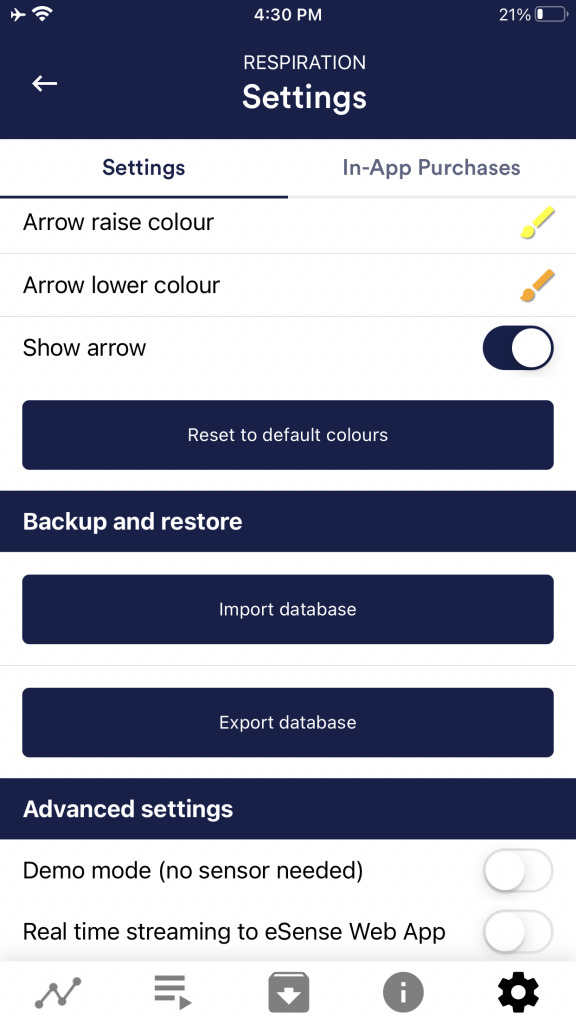
Demo Mode
A saved measurement is played back automatically. A real sensor is not needed.
Real time streaming to eSense Web App
This allows you to stream the data live to the eSense Web App. More information in the Account and Cloud section.
Questions