Help Center
Open Training
As a second option, you can also do free training. This differs from the procedures in that it is a little more complex. In the following we give you a few examples of how EMG biofeedback training with the eSense Muscle could look in different applications.
Please consider this only as a rough guide. There are a variety of options, this is just a brief overview. There is a lot of literature on the subject of EMG biofeedback, which gives further assistance on how to proceed.
Preparation and start
- Follow the first steps of preparation from the previous chapter and select a free workout in the selection screen after starting the app. Then switch to the settings and connect the eSense Muscle there. Select the channel and filter you want. Go back to free practice.
- Now start a free measurement (just press “Start” in the main screen) and take a first look at the measured values of your muscle signal. Let your muscles loose and try to tense them as much as possible. You should see a suitable response on the curve.
- In order to achieve optimal comparability of sessions, you can define the time for a measurement in the settings of the eSense app and limit it to a value, e.g. 10 minutes. The measurement then stops automatically after this time has elapsed. In the standard setting of the eSense app, the measurement time for the eSense Muscle is a maximum of 30 minutes. If you want to exercise longer, you will need to split the exercise into two or more recordings. It is advisable to set a time after the first experiments and to set it in the settings, which corresponds to the desired, regular training duration. In this way you will receive an optimal evaluation and comparability of your training sessions later.
- The choice of channels and filter settings is also essential for comparing measurements with one another. Obviously, you can only compare measurements with the same number of channels and the same filter settings. Test the available filter settings once and look for the filter that best represents the muscle signal. First choose the narrowest filter and only switch to a wider filter if you have the impression that the signal is only partially and inadequately displayed. Experimenting with the filters is useful and helpful in order to get an assessment of the muscle signal.
- The filters have a further meaning when it comes to the assessment of the muscle signal with regard to the so-called “slow twich” and “fast twich” muscle fibers. While the fast fibers are responsible for strong and fast movements and their activity is mainly between 100-200 Hz, the slow fibers ensure that a basic muscular tension is maintained. The slow fibers are also more persistent and react to physical and emotional stress. Their frequency maximum is below 80 Hz and can be better captured with the 20-300 Hz filter. More on this in the following sections.
Usual applications, for example muscle building training
- In this example, the goal is to gradually increase electrical muscle activity and thus its muscle contraction force. Both the maximum achievable level of the amplitude (the strength of the tension) and the duration over which this can be maintained play a role.
- A reduction in strength or a disorder of fine motor skills can be positively influenced by biofeedback EMG muscle building training. The special feature here is the fine resolution of the measurement, i.e. even minimal muscle activity can be measured and made visible. Under certain circumstances, this can be a tension that is only visible in a slight increase in the measurement curve, not in a visible movement of the measured muscle.
- The activity of the muscles can be increased bit by bit through targeted training. It is assumed that biofeedback training promotes the facilitation of neurophysiological reorganization processes.
- In this example, 2-channel leads are often used. For example, if the left arm is weaker than the right arm, the 1st channel can be placed on the left arm and the 2nd channel on the right arm, on the same muscle. This allows the measured values of both arms to be compared with each other and a training goal can be to train the left arm to the same strength as the right arm. The side comparison is helpful in many situations. One canal can also be increased while the other canal should remain calm, i.e. one muscle should be tensed while the other muscle should NOT be specifically tensed.
- The training of building and strengthening muscles can also be combined with aids such as sports equipment, dumbbells, etc. in order to achieve an additional training effect. The biofeedback measurement helps to measure the progress and to present a clear comparison of the measurements. As always, make sure that the electrodes, the filters and the training duration are positioned exactly the same and repeatedly.
Common uses, for example muscle relaxation
- There are different levels of application in the field of muscle relaxation / muscle relaxation:
- To support psycho-education / self-awareness, e.g. to show how muscles react to stimuli such as negative thoughts, certain postures and certain everyday situations. Also to gain a conviction of control that control over the muscles can be exercised and observed.
- Place the electrodes either directly on the muscles that you want to reduce tension or where you suspect increased tension. With relieving postures, increased muscle tension can occur in a completely different place, for example, because muscles are tensed there in order to spare other muscles.
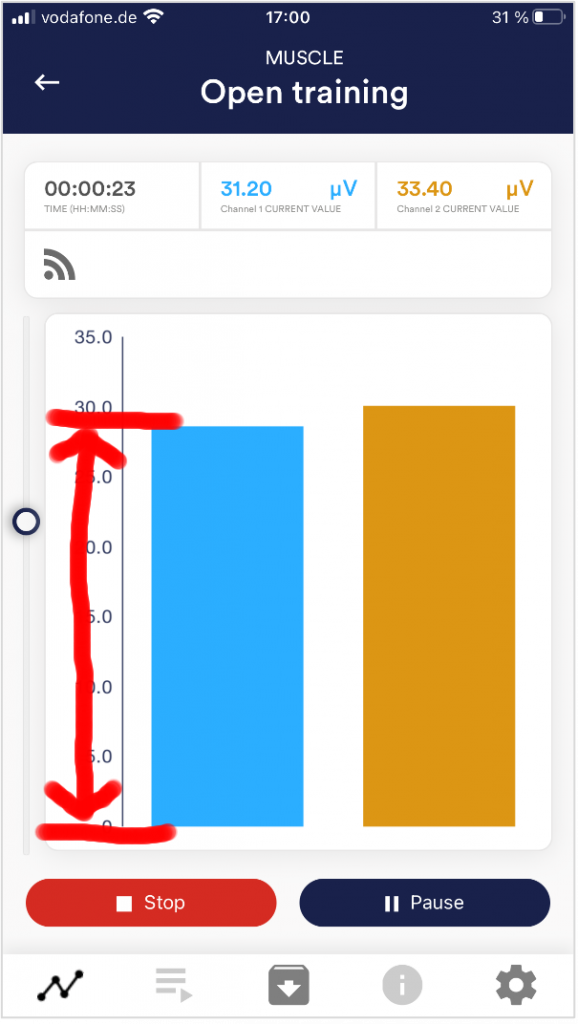
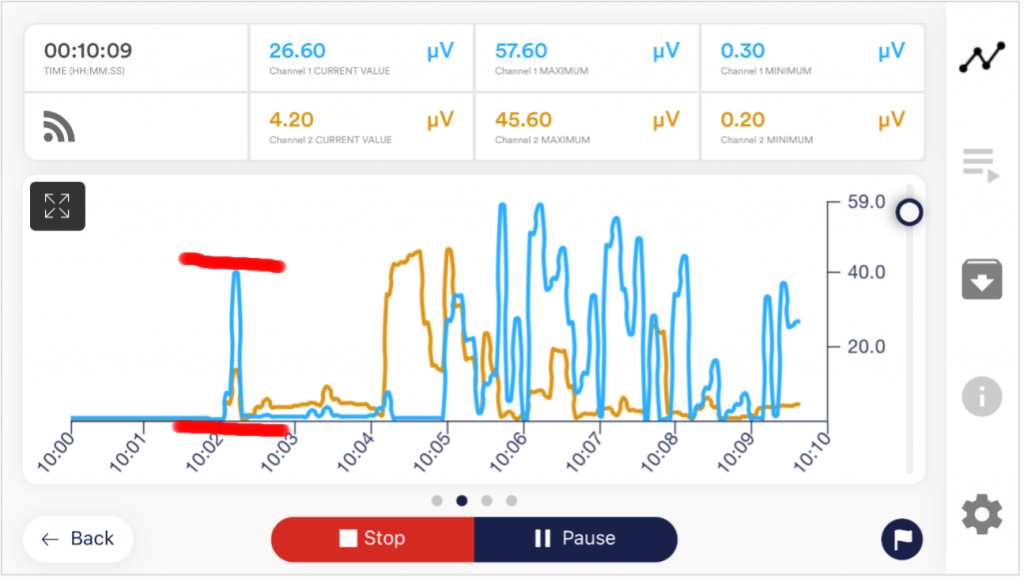
- Start the measurement and observe your measured values for a while. You can see your muscle activity in the form of a curve or bar. On the main screen of the app in portrait format, you can see the amplitude in the form of a bar. This is the most direct form of presentation. In landscape format you can see the muscle tension as a curve and numerical values.


Two images of the muscle tension bar in portrait format and the muscle signal curve in landscape format.
- As an exemplary exercise, you can try to tense your muscles and then loosen them up as best you can. Repeat this a few times. While doing this, observe the measured values and see whether you are able to lower the measured value even further than at the beginning of the measurement. You can also have another person massage your tense muscles and see the effects that a relaxation massage has on the muscles. This is also often clearly visible in tense muscles.
- Try how different postures (sitting, standing, lying) affect the muscles. For example, sitting and working at a desk can often be accompanied by poor posture that has negative effects on the muscles. Note that increased muscle tension does not always show when you measure with the eSense Muscle in a comfortable position, but sometimes only under certain problematic conditions, which you can then integrate into the measurement.
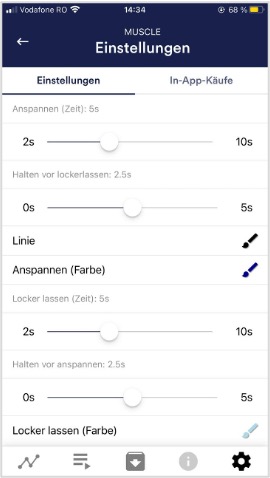
- Practice tension and relaxation using the contraction aid. You can activate the contraction aid in the settings of the app; it is not activated by default. Activate this and start exercising at a usual frequency. Adjust the frequency according to your wishes and switch to landscape format during free training, where you can change the view by “swiping” and get to the oscilloscope + contraction aid. Practice the tension and relaxation phases for a few minutes and observe the curve and values.

5 seconds to tense, hold for 2.5s and 5 seconds to relax, let loose for 2.5s (= 4 contractions per minute)
- Train with the help of the various biofeedback functions that the app offers you. In landscape format you have the contraction aid as a line and sphere. You have a freely selectable video, which changes in many ways to match the muscle tension. Use music and tones, which you can activate in the settings. The individual feedback functions are all described in more detail in the corresponding chapter of the app.
- Use the procedures provided! This enables you to get to know the various functions of the app even better and to carry out standardized training. If you like, you can create your own, individual procedure with your favorite feedback variants.
Usual applications, example stress test
- Under certain circumstances, it makes sense to work more specifically with stress stimuli in order to train how to cope with stress. EMG biofeedback is well suited for the use of targeted provocation methods, as it shows a prompt and sensitive reaction to a stimulus, and this reaction is often proportional to the strength and significance of the stimulus.
- Start the measurement and observe your measured values for a while. Then try to relax. The training begins with a rest period of a few minutes.
- Now a stressor (stress stimulus) is to be used in a targeted manner. Examples are: negative thoughts, looking at emotionally charged images or objects as well as unpleasant noises. Tasks such as mental arithmetic, simulating an exam or uncomfortable situation over a certain period of time are also good stressors. As a rule, everyone knows things that cause tension and excitement. For example, if you are reluctant to speak in front of large crowds, try giving a speech spontaneously or trying to imagine the situation. If you are exposed to such a stressor, watch the readings and you will likely see an increase in muscle tension and a persistence at a higher level. Then try to let the curve drop again, loosen the muscles in a targeted manner and get back to a low starting level.
- Within a training session you can alternate the phases of relaxation and stressors, about three to four times. Always end a session with a rest phase and do not overwhelm yourself. Do several training sessions, spread out over a longer period of time, until you feel like you are reacting less severely to stressors or recovering more quickly.
Questions